
Overview
MFA adds an extra security step at login by requiring a one-time 6-digit code sent to your sign-in email.
You can enable MFA in two ways:
- Company-wide enforcement (Account Owner)
- Individual user opt-in (My Settings)
Step-by-Step Instructions
🔐 Option A: Require MFA for all users (Account Owner)
- Go to Company Settings.
- Open the Security tab.
- Turn on Require email verification for all users.
- Save your changes.
What to expect:
- This applies to eligible users across the account.
- Users who sign in with Google or Microsoft may already satisfy MFA through SSO.
- A grace period may apply after activation (if enabled in your environment).
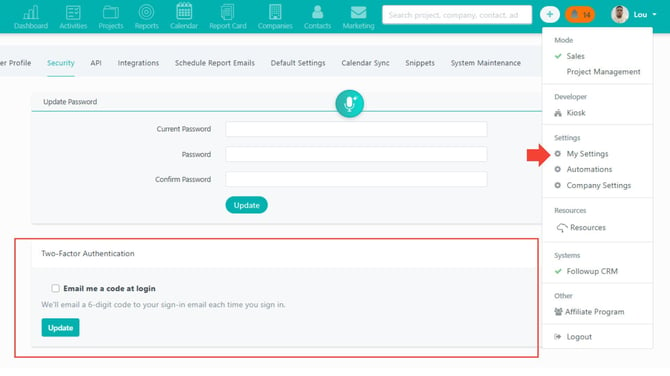
👤 Option B: Enable MFA for your own user account
- Go to My Settings.
- Open the Security tab.
- Under Two-Factor Authorization, enable Email me a code at login.
- Save your changes.
✉️ Complete MFA during login
- Sign in with your normal login method.
- Check your sign-in email inbox for a 6-digit verification code.
- Enter the code on the MFA verification screen.
- Click Verify to finish signing in.
Result
After setup, your account (or your entire team, if enforced) uses email-based MFA at login, adding a stronger layer of protection to Followup CRM access.
Best Practices
- Use a sign-in email you can access quickly.
- Always use the most recent verification code email.
- Check spam/junk folders if code delivery is delayed.
- If enforcing company-wide MFA, notify users before activation.
- Keep SSO settings and security policies aligned across your team.
Happy Selling!