📍 Overview
The Procore integration in Followup CRM allows teams to:
- Connect projects between systems
- Sync standard and Bid Board projects
- Configure module-level syncing
- Manage oversized documents
- Map Procore custom fields
- Sync project users and directories
The integration is managed at the company level for easier team administration.
⚙️ Step-by-Step Instructions
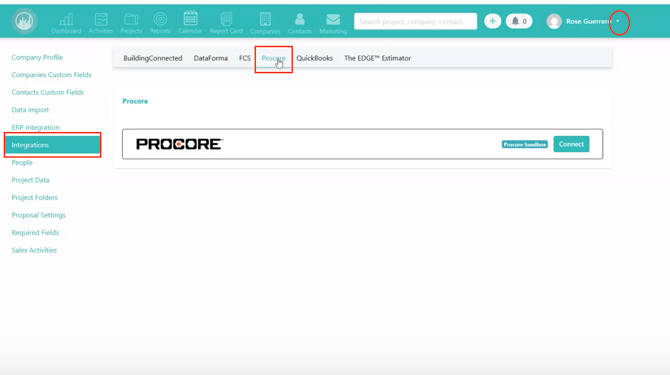
1️⃣ Open the Procore Integration
- Go to Company Settings
- Open the Integrations tab
- Select Procore
📌 Procore is now configured as a team-based integration instead of individual user connections.
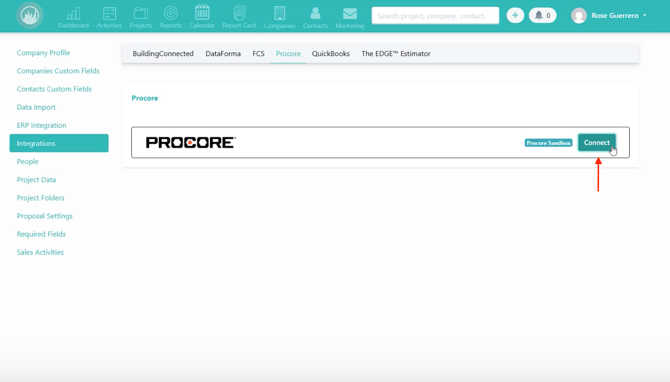
2️⃣ Connect to Procore
Click Connect.
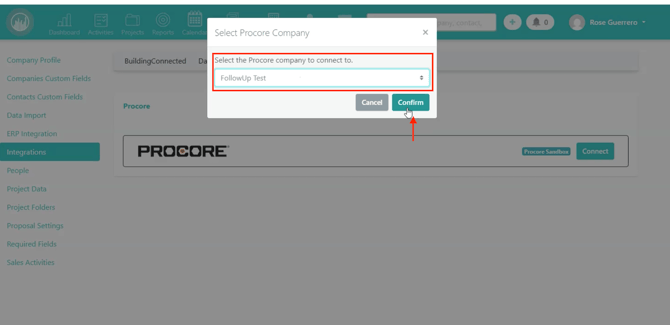
If you are not logged into Procore:
- You’ll be redirected to the Procore login page
- Log in
- Return to Followup
- Select your company
- Click Confirm
If you are already logged into Procore:
- Authentication happens automatically
- Select your company
- Return to Followup
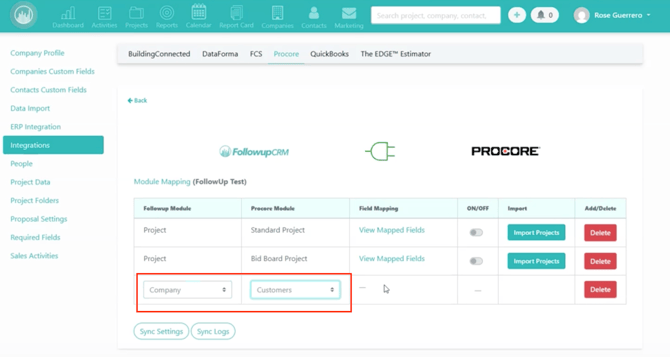
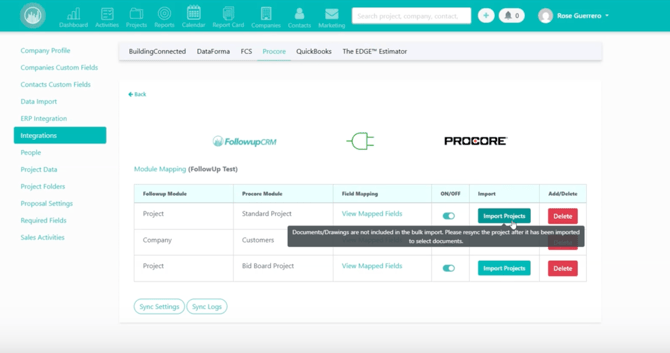
3️⃣ Open Module Settings
After connecting:
- Click Settings
This opens the Module Mapping area.

4️⃣ Configure Project Modules
You’ll see two main project areas:
- 📁 Standard Projects
- 🏗️ Bid Board Projects
Enable the modules your team wants to use.

5️⃣ Configure Company & Contact Syncing
You can also:
- Sync company records
- Sync customer/contact information
This keeps company data aligned between both systems.
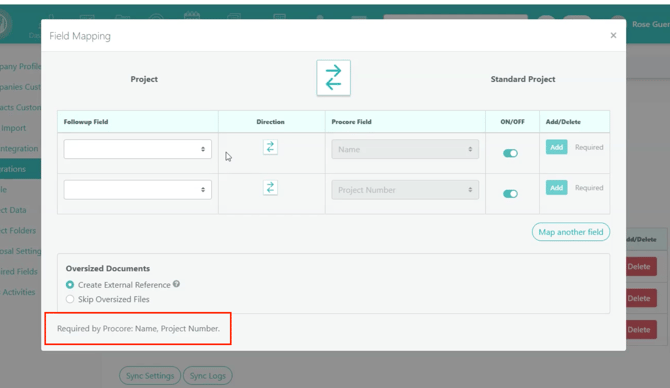
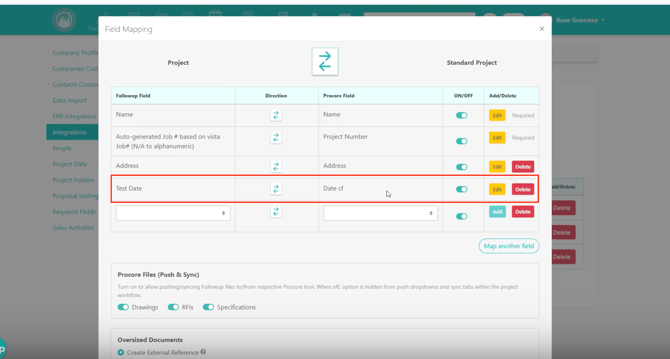
6️⃣ Map Required Fields
Inside each module:
- Review default mappings
- Add additional fields if needed
📌 Required fields are listed at the bottom.
Common required fields include:
- Project Name
- Project Number
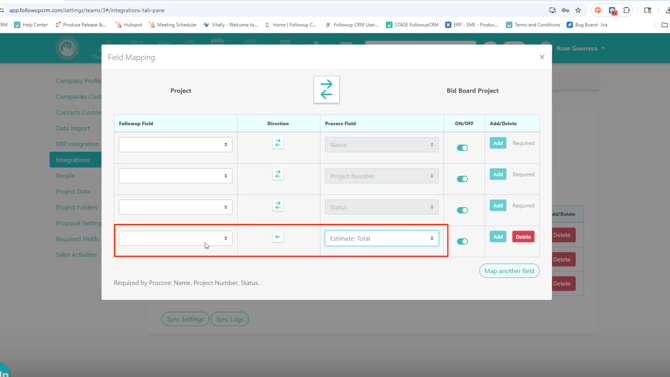
7️⃣ Understand Sync Direction Settings
🔁 Standard Project Modules
Most fields support:
- Followup → Procore
- Procore → Followup
↩️ Bid Board Estimate Fields
Estimate fields are:
- Procore → Followup only
⚠️ This is a Procore limitation related to estimating workflows.
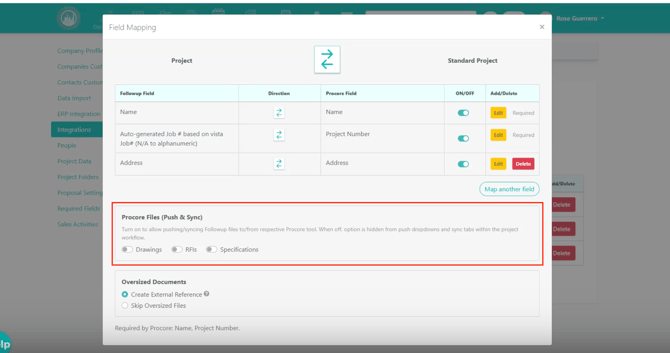
8️⃣ Enable or Disable Project Modules
Within the settings, you can enable or disable:
- 📄 Documents
- 📐 Drawings
- ❓ RFIs
- 📚 Specifications
- 📦 Content Modules
Why this matters:
- Enabled modules appear in projects
- Disabled modules stay hidden
✅ Best Practice:
Only enable modules your team actively uses.
9️⃣ Configure Oversized Document Settings
Followup supports files up to 200MB.
For larger documents, choose one of these options:
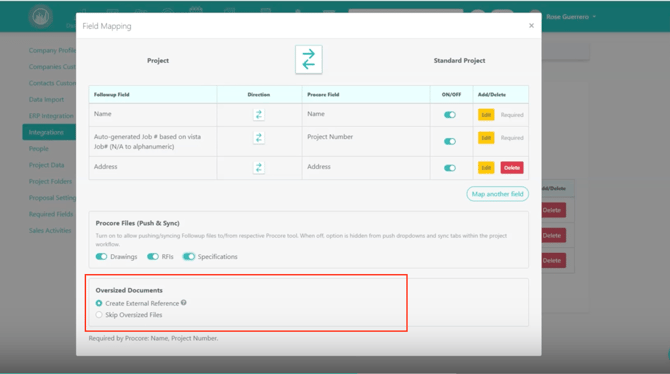
🔗 Create External Reference (Recommended)
Creates a placeholder file in Followup that:
- Links directly to the Procore file
- Opens/downloads the file from Procore
✅ Recommended for maintaining complete document visibility.
⛔ Skip Oversized Files
Large files:
- Will not sync
- Will not appear in Followup
Use this option if your team prefers a cleaner document library.
🔟 Map Procore Custom Fields
Scroll to the bottom of the mapping area.
You’ll see:
- Organization-level Procore custom fields
Map them to:
- Corresponding Followup custom fields
📌 Only connected modules appear within project workflows.
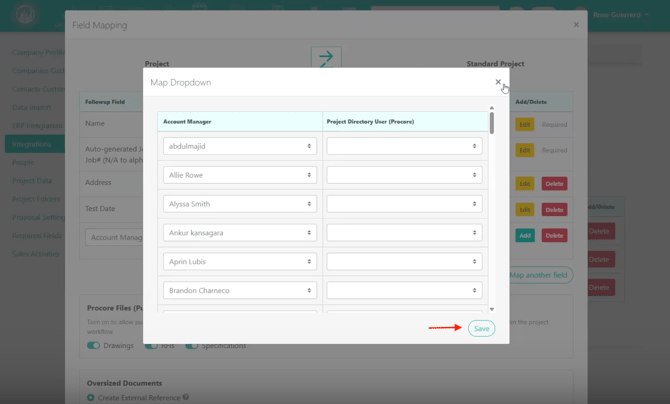
1️⃣1️⃣ Map Project Users
You can map Followup users to:
- Procore Project Directory users
This is useful for syncing:
- Project managers
- Account managers
- Team members
Multiple users can sync into the same Procore project.
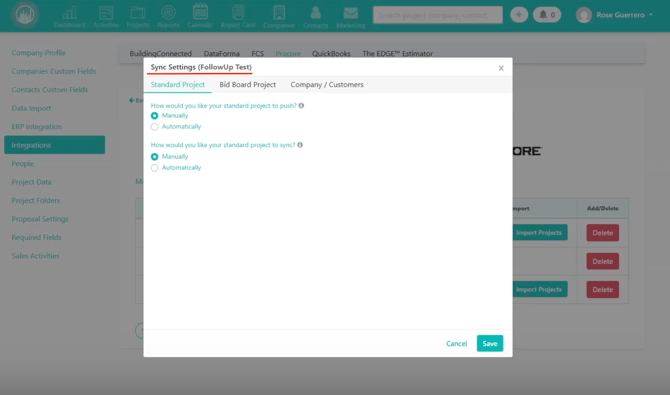
1️⃣2️⃣ Configure Sync Settings
Open Sync Settings to:
- Enable automatic syncing
- Configure project-level schedules
- Configure module-level schedules
This helps keep project data updated automatically.
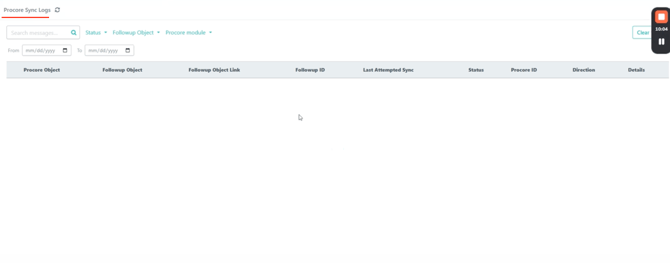
1️⃣3️⃣ Review Sync Logs
Open Sync Logs to:
- Monitor sync activity
- Review errors
- Troubleshoot issues
Especially useful when scheduled syncing is enabled.
1️⃣4️⃣ Import Projects
Use the Import Projects button to:
- Import projects into Followup
- Sync projects between systems
Happy Selling!