
🔎 Overview
Foundation On-Premises connects Followup CRM to a Foundation database hosted on your company’s SQL Server.
Your IT or Foundation administrator prepares secure database access. A Followup specialist then helps you:
- Test the database connection
- Select the correct Foundation company
- Configure field mappings
- Validate the integration with a test record
Note: Foundation On-Premises features may be released in stages. Your Followup specialist will confirm which workflows are available for your account.
6. ✅ Step-by-Step Instructions
Step 1: Gather your database information
Ask your IT or Foundation administrator for:
- SQL Server hostname
- Named instance, if applicable
- SQL Server port
- Foundation database name
- Dedicated SQL username and password
- Foundation company name and number
- Firewall or IP-allowlisting requirements
- Certificate or encryption requirements
🔒 Security reminder: Never send your database password through email, chat, or a support ticket. Use the secure method provided by your Followup specialist.
Step 2: Prepare database access
Ask your IT team to create a dedicated SQL account for the integration.
The account must be able to:
- Connect to the Foundation database
- Load the available Foundation companies
- Read the information required for field mapping
- Access the approved integration workflows
Your IT team may also need to configure:
- SQL Server TCP/IP access
- Firewall rules
- Approved IP allowlisting
- DNS resolution
- SQL Server port access
- TLS or certificate settings
⚠️ Important: Remote desktop access does not automatically allow Followup CRM to connect to your Foundation database.
Step 3: Open the Foundation integration
Your Followup specialist will complete the connection with you.
- Open Company Settings.
- Select ERP Integration.
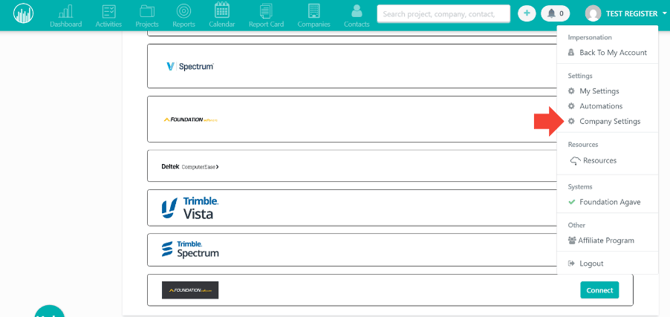
- Locate Foundation.
- Click Connect.

- Select On-premises.
Choose Hosted by Foundation only when Foundation hosts your environment.
Step 4: Enter the database details
Complete the connection form using the information supplied by your IT team.
| Field | Information required |
|---|---|
| Database host | SQL Server hostname or approved address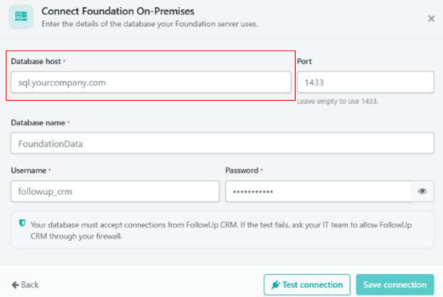
|
| Port | SQL Server port; leave blank to use 1433 |
| Database name | Foundation database name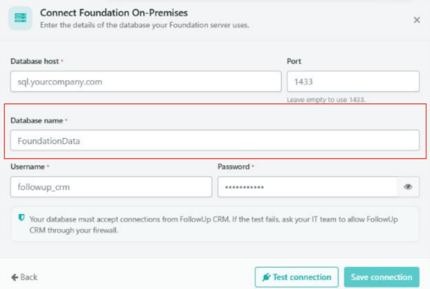
|
| Username | Dedicated SQL username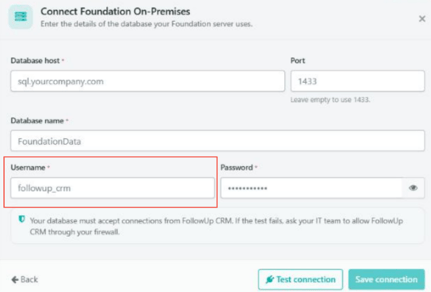
|
| Password | Password for the SQL account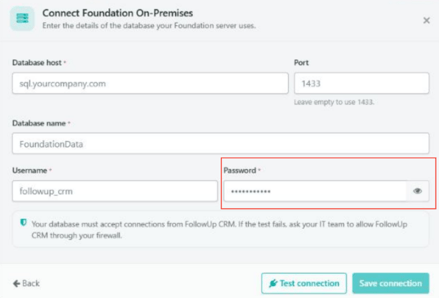
|
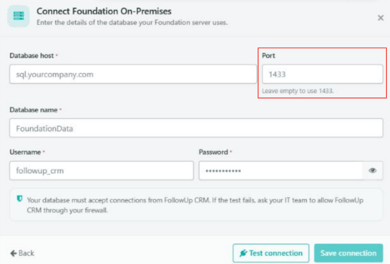
If your server uses a named instance, enter the host in this format:
SERVER\INSTANCE
Whenever possible, an authorized customer administrator should enter the password directly.
Step 5: Test the database connection
Click Test connection.
Followup checks whether it can:
- Reach the SQL Server
- Authenticate using the supplied credentials
- Open the Foundation database
- Read the information required for setup
- Find the available Foundation companies
If the test fails, review the error with your IT team before continuing.
Step 6: Select your Foundation company
After a successful test, the Foundation company field appears.
- Review the available companies.
- Select the company you want to connect.
- Verify its company name and number.
If the database contains only one company, Followup selects it automatically.
⚠️ Followup uses this company for every supported record it reads from or sends to Foundation. Confirm the selection carefully.
Step 7: Save the connection
Click Save connection.
Followup verifies the details again before saving the connection. Your database credentials are encrypted when stored.
If you change any connection detail after testing, click Test connection again before saving.
Step 8: Configure field mappings
Your Followup specialist will open Map Fields and match your Followup fields with the available Foundation fields.
Mappings may include:
- Company name
- Foundation customer number
- Contact information
- Address information
- Project or job details
- Project manager
- Department
- Payment terms
- Custom fields
- Dropdown values
Foundation fields are loaded from your database. Available fields may differ between Foundation environments.
Step 9: Confirm your numbering method
Decide how Foundation customer numbers should be assigned.
Depending on your configuration, the number may come from:
- A value entered during the workflow
- A Followup custom field
- An existing linked Foundation record
- Automatic numeric generation
Automatic generation finds the highest numeric customer number for the selected Foundation company and adds one.
💡 Alphanumeric customer numbers are not included in this calculation. This method may also differ from Foundation’s internal next-number setting.
Step 10: Test the integration
Work with your Followup specialist to select an approved test record.
Verify that:
- Required fields are mapped
- Values reach the correct Foundation company
- Dropdown values match
- The expected record number is used
- The record is linked correctly in Followup
- No duplicate record is created
Ask your Foundation administrator to verify the record in Foundation.
Step 11: Confirm the enabled workflows
After testing, your Followup specialist will confirm:
- Which record types are enabled
- Which fields are mapped
- Which system controls each field
- How record numbers are assigned
- Which synchronization directions are available
- Any current limitations
Do not enable ongoing or scheduled synchronization until your Followup specialist confirms that testing is complete.
7. 🎯 Result
After completing these steps, your Foundation database will be securely connected to the correct Followup team and Foundation company.
You will also have:
- A verified database connection
- An approved Foundation company selection
- Configured field mappings
- A confirmed numbering method
- A successfully validated test workflow
- A clear understanding of available integration features
8. 💡 Best Practices
- Use a dedicated SQL account instead of a personal administrator account.
- Give the account only the permissions required for the integration.
- Never include database passwords in emails, chats, screenshots, or support tickets.
- Confirm the Foundation company before saving the connection.
- Test with an approved non-production record whenever possible.
- Review all field and dropdown mappings before sending records.
- Confirm whether Foundation or Followup should control record numbering.
- Contact your Followup specialist before changing the server, database, or SQL credentials.
- Do not enable scheduled synchronization until testing is complete.
- Confirm feature availability before relying on Project, Job, Change Order, import, or scheduled-sync workflows.
Happy Selling!