
Overview
Calculated Custom Fields allow your team to automatically calculate values using formulas based on other custom fields.
Instead of manually updating totals, percentages, costs, or other calculated values, admins can create formula-based fields that update based on the values entered on a project.
Calculated fields are helpful for tracking items such as:
- Totals
- Margins
- Percentages
- Estimates
- Costs
- Scores
- Other project-specific calculations
🧮 How to Create and Manage Calculated Custom Fields1. Go to Custom Field Settings
- Navigate to Company Settings.
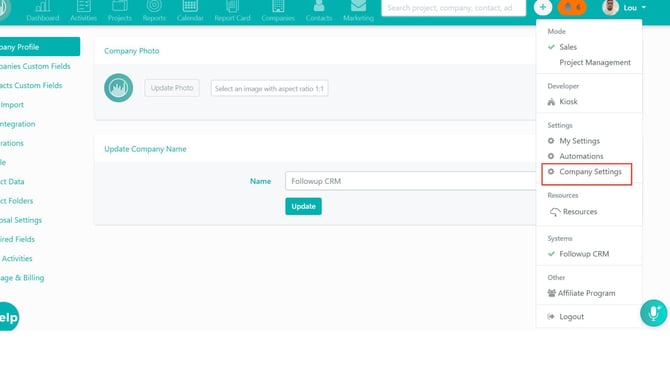
2. Open the custom field settings area.
3. Select the custom field section where you want to create the calculated field.
Note: Calculated custom fields are typically managed by admins or users with permission to edit company settings.
2. Create a New Custom Field
- Click Add Custom Field.
-1.jpg?width=670&height=377&name=Untitled%20design%20(10)-1.jpg)
- Enter the field name.
- Choose the field type for a calculated or formula-based field.
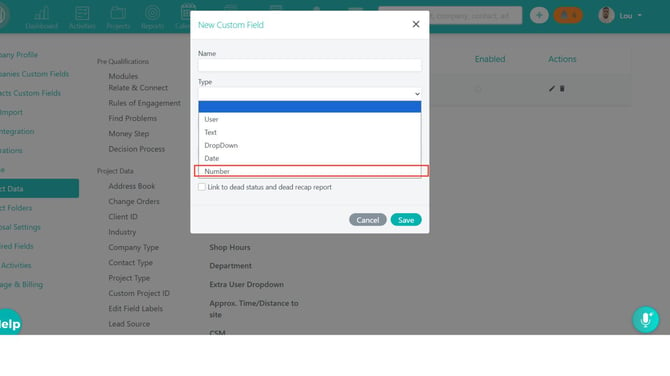
3. Confirm the field should be used for calculations.
Use a clear field name so users understand what the field represents.
Examples:
- Total Estimated Cost
- Gross Margin
- Adjusted Bid Amount
- Forecasted Profit
3. Build the Formula
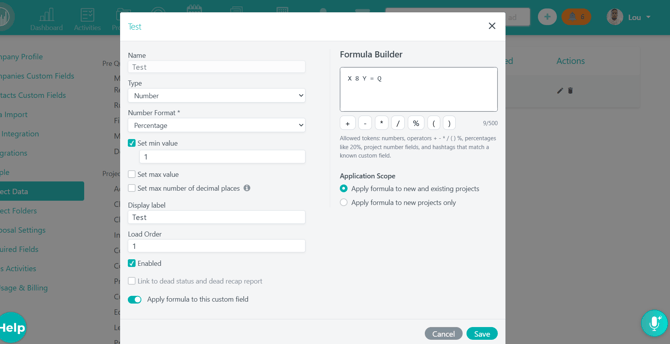
Use the formula builder to create the calculation.
A formula may include:
- Existing numeric custom fields
- Operators such as add, subtract, multiply, or divide
- Fixed numbers
- Grouped calculations using parentheses
Example formula:
Another example:
Important: Make sure the fields used in the formula contain numeric values. Text-based fields should not be used in calculations.
4. Save the Calculated Field
- Review the formula.
- Confirm the selected fields and operators are correct.
- Save the custom field.
After saving, the calculated field becomes available based on your company’s custom field setup.
5. Use the Calculated Field on Projects
Once created, the calculated field can appear on project records with your other custom fields.
Users can enter values into the fields that feed the formula. The calculated field will display the result based on the formula setup.
For example, if a calculated field adds three cost fields together, the total will update based on the entered cost values.
6. Manage Existing Calculated Fields
Admins can return to the custom field settings area to manage calculated fields.
Depending on your permissions, you may be able to:
- Edit the field name
- Update the formula
- Reorder the field
- Show or hide the field
- Remove the field if it is no longer needed
Warning: Editing a formula may change the calculated result on existing project records. Review formulas carefully before making updates.
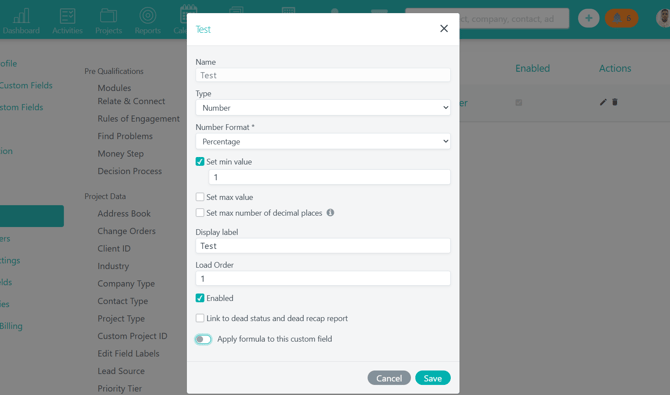
7. Use Calculated Fields in Reports and Project Views
Calculated fields may be available in areas such as:
- Project views
- Project custom field sections
- Reports
- Custom reporting
- Exports
Availability may depend on your company settings, permissions, and reporting setup.
Result
After creating a calculated custom field, your team can automatically calculate important project values without manually updating totals or formulas outside FollowUp CRM.
Best Practices
- Use clear field names that explain the calculation.
- Test formulas before relying on them for reporting.
- Use numeric fields in formulas whenever possible.
- Keep formulas simple and easy to understand.
- Avoid deleting fields that are used in existing formulas.
- Review calculated fields before using them in reports or exports.
- Limit formula editing to admins or trained users.
Happy Selling!