
Overview
Proposal Approval ensures quotes are reviewed internally before being sent to customers.
When a proposal matches your approval conditions (such as amount thresholds), Followup CRM switches the workflow to approval mode. Once approved, the proposal can be sent to the client. If rejected, it is returned with feedback for updates.
⚙️ Step 1: Configure the approval rule in Automations
- Go to Automations and create or edit an automation.
.jpg?width=670&height=377&name=Untitled%20design%20(64).jpg)
- Select Proposal as the object.
- Choose a trigger condition such as Proposal Amount > X.
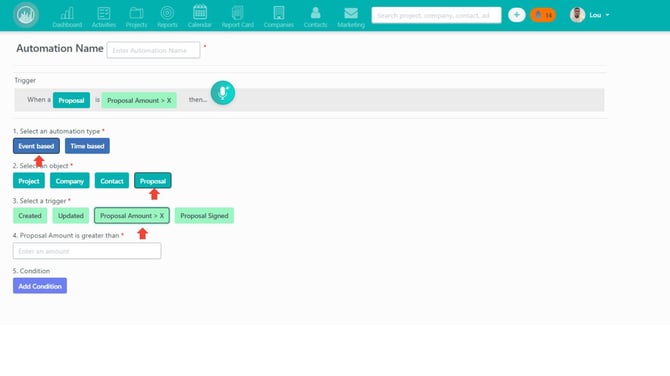
- Set your threshold (example: greater than
$200,000).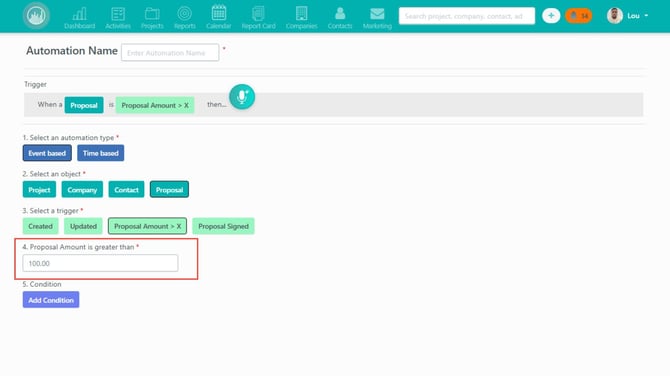
- Add additional conditions if needed (for example, proposal/project fields, greater than/less than logic).
- Set the action to Request Quote Approval.
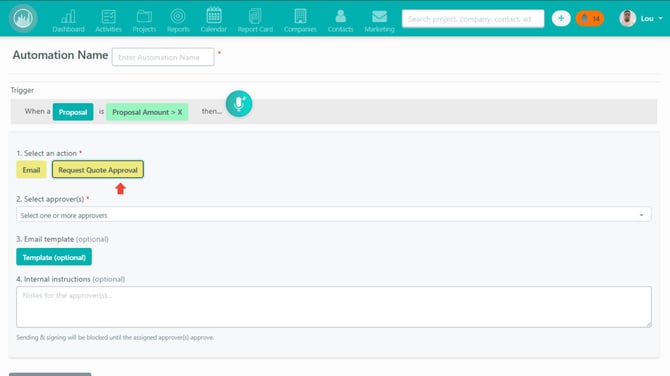
- Assign the approver(s).
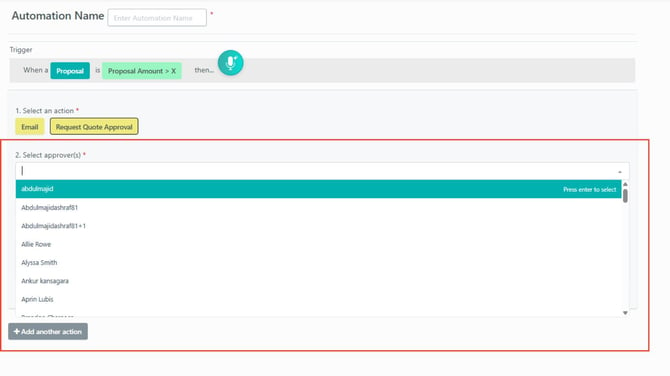
- Save and enable the automation.
ℹ️ Note: You can combine multiple conditions to narrow when approval is required.
🧾 Step 2: Build or update the proposal
- Open the proposal in Proposal Generator.
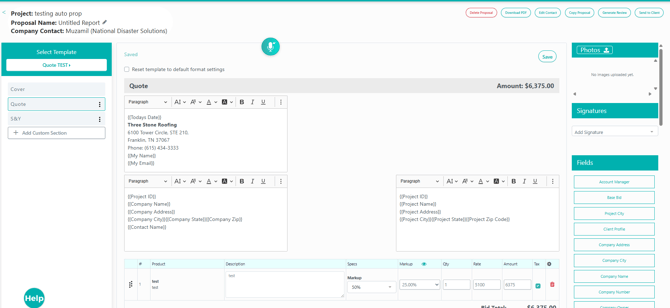
- Add quote items, markup, or pricing changes.

- Increase or decrease amount based on your test scenario.
Follow-up CRM will automatically evaluate the rule:
- If proposal matches the condition, it enters approval flow.
- If proposal no longer matches, it returns to normal send flow.
🚦 Step 3: Confirm the button/state change
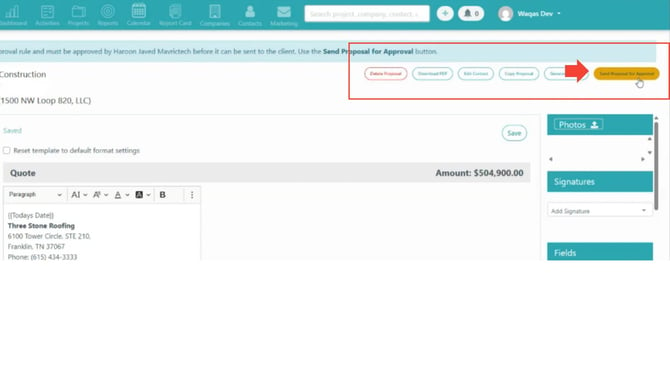
- When approval is required, you should see Send for Approval.
- When approval is not required, you should see Send to Client.
✉️ Step 4: Submit for approval
- Click Send for Approval.
- Add an internal message (optional).
- Submit.
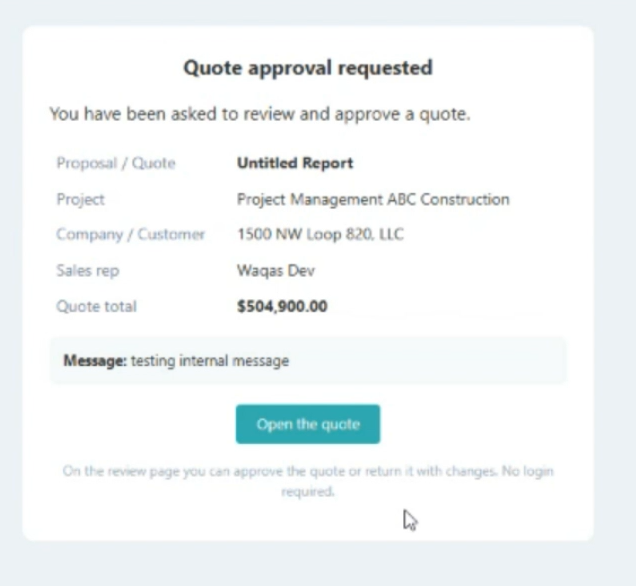
The assigned approver receives an email request.
🔐 Step 5: Open the approval link with the correct approver account
- Open the email approval link.
- Make sure you are signed in as the assigned approver.
If signed in as a different user, you will see a no permission message.
⚠️ Important: Approval actions are permission-based and tied to the assigned approver login.
✅ Step 6: Review and decide
On the approval review page, the approver can:
- Review proposal details
- View approval history/audit trail
- Approve the proposal, or
- Reject with a comment
If rejected, the comment is returned to the proposal workflow for updates.
📤 Step 7: Send to client after approval
After approval, return to Proposal Generator:
- Status reflects approved
- The action changes to Send to Client
- Proposal can now be sent using the normal send flow
Result
After completing these steps, your proposal approval process is enforced automatically: qualifying proposals require approval, approvers can review and decide securely, and approved proposals move forward to client delivery.
Best Practice
- Use clear amount thresholds to avoid over-triggering approvals.
- Add concise internal context when submitting for approval.
- Test both match and non-match scenarios (above and below threshold).
- Verify approver account access before testing email links.
- Review approval history regularly for governance and audit readiness.
Happy Selling!