
Overview
This guide covers the complete setup process for integrating Followup CRM with Viewpoint Vista using App Xchange.
You’ll create the required Vista service user, deploy the customer workspace, configure all required connections, run one-time onboarding, and map modules and fields for ongoing synchronization.
Step-by-Step Instructions
🧩 Phase 1: Create the Vista service user and prepare agent installation
- In Vista, go to Viewpoint Administration → Programs → VA User Profile.
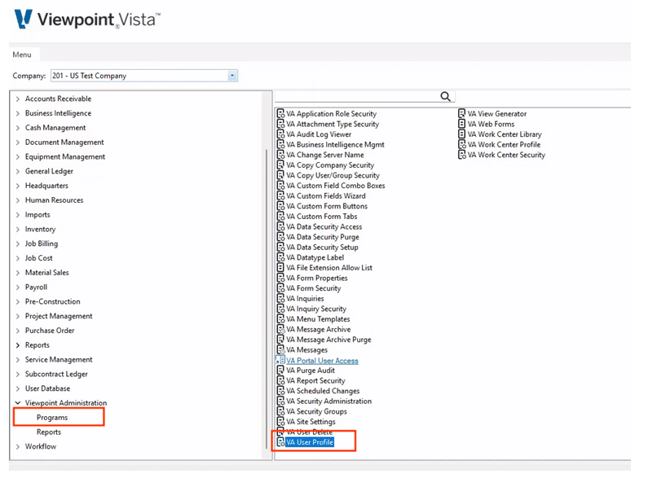
- Create a new user record.
- Enter a username, set User Type = User Application, then complete full name and email.
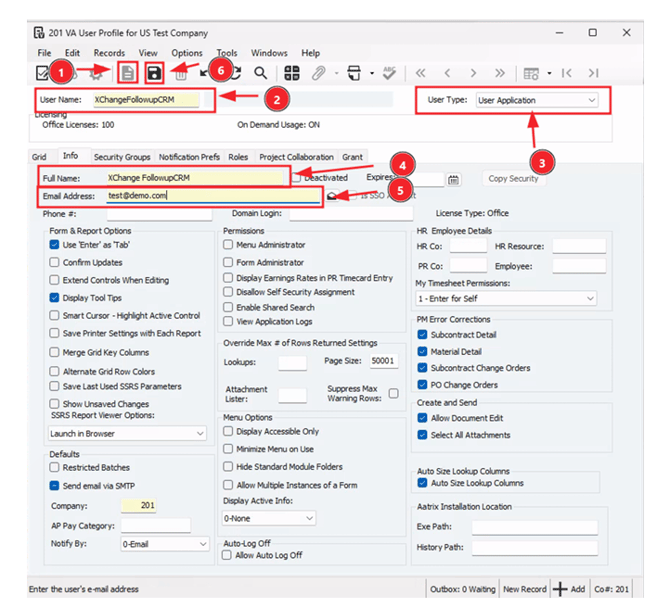
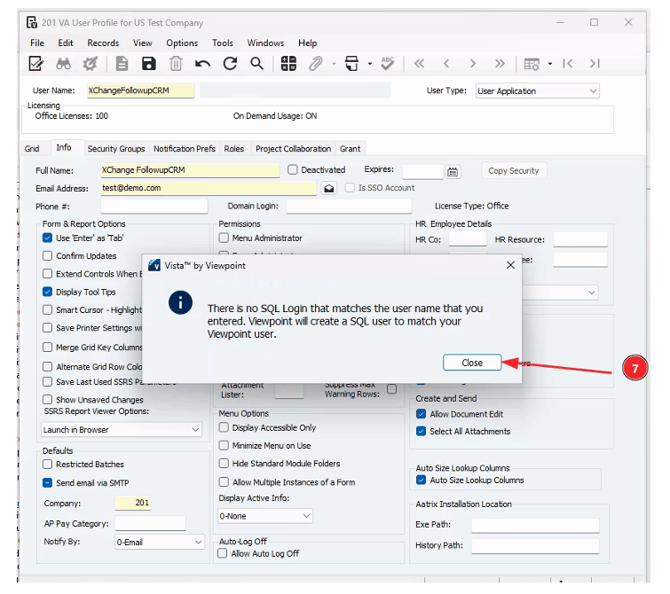
- Save the user and confirm the SQL login creation prompt.
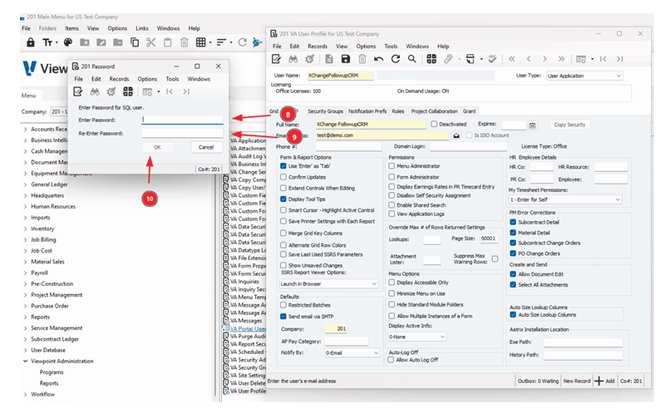
- Set and confirm a secure password for the SQL user.
- Review VA Data Security Setup and confirm required security scope.
- Add the required security groups on the VA Data Security Setup
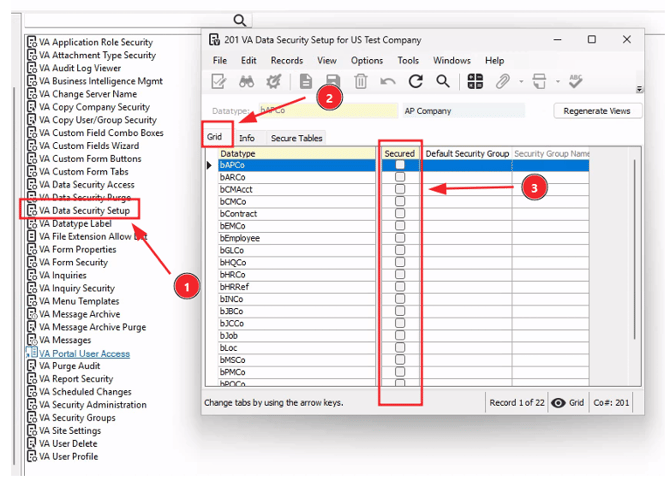
- Assign the required security groups to the service user.
- In AppExchange , open Connectivity → On-Prem Agents and copy the page URL.
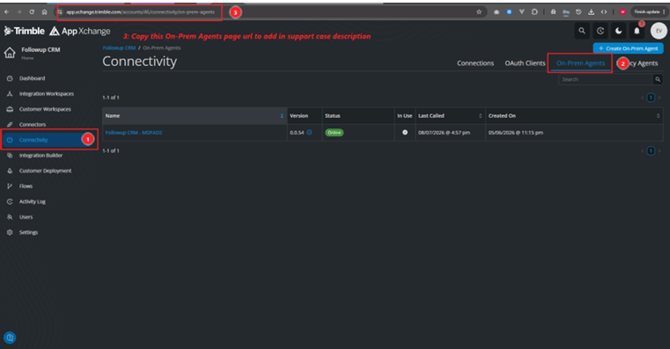
- Submit a Trimble support case with:
- Vista server name
- Vista service username
- On-Prem Agents page URL
⚠️ Important: Do not include the Vista service-user password in the support case.
- Wait for Tremble to reach back out to you to Install Connector on Vista Instance
- Reach out to your CS Manager to assist with Phase 2 & Phase 3
🏢 Phase 2: Deploy the customer workspace in App Xchange
NB: Schedule appointment with CS Team to assist you with steps 1 through 5
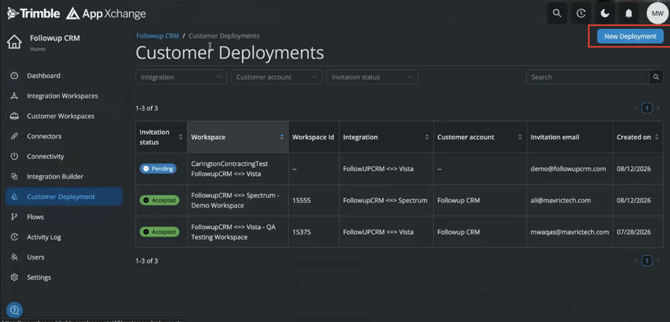
- In App Xchange, start a new customer deployment.
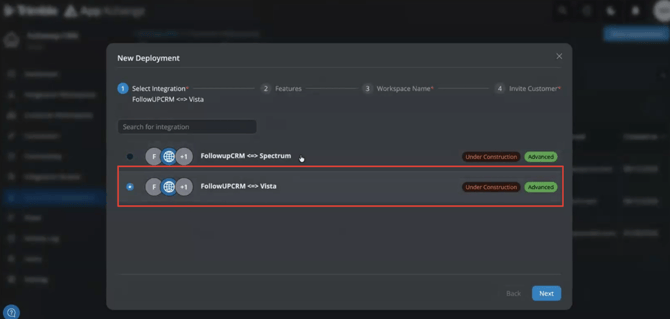
- Select Followup CRM to Viewpoint Vista and continue.
- Select all approved customer deployment features.
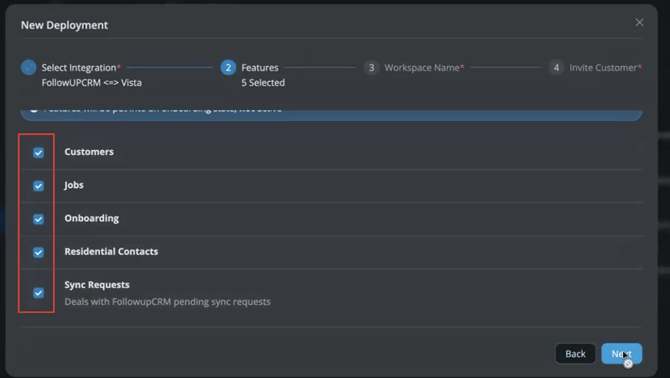
- Name the workspace using your standard naming format (for example:
Customer Name - FollowupCRM to Vista).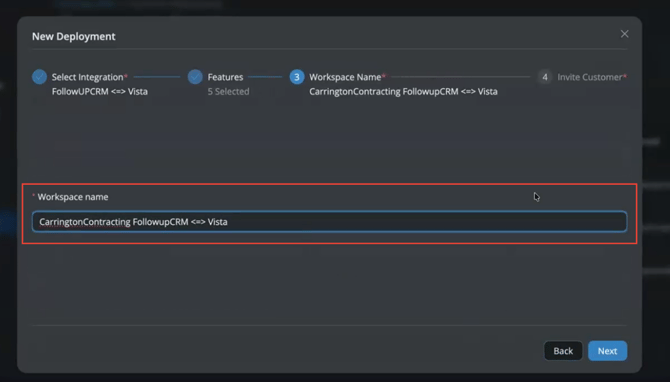
- Enter the authorized customer email and send the invitation.
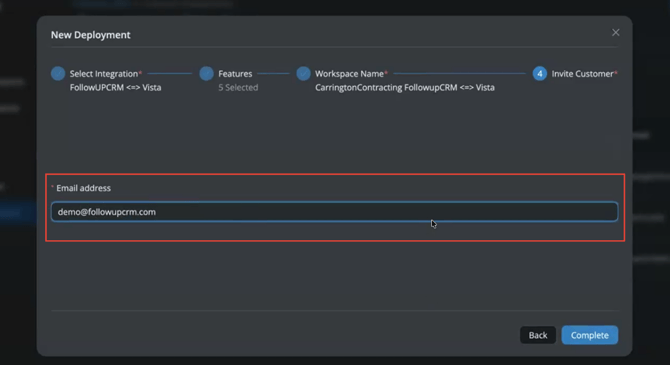
NB: Once CS Team has assisted you with the above you may continue with steps 6 through 8
- Customer accepts the invite and signs in (or creates a Trimble account if needed).
- Open Customer Workspaces and select the new workspace.
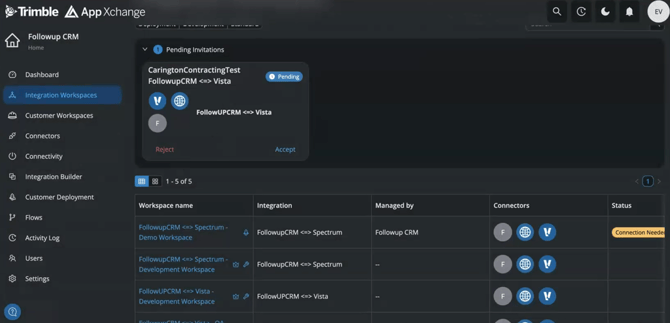
- Confirm the workspace dashboard loads successfully.
From this point on your C.S Manager will configure the rest of the intergration
Result
After completing these steps, you will have a fully configured Followup CRM + Vista integration in App Xchange, including workspace deployment, active connectors, completed onboarding, and field mappings ready for production sync.
Best Practice
- 🔒 Use a dedicated Vista service user for integration only.
- 🔐 Share credentials through approved secure channels only.
- 🧪 Confirm all three connectors are Connected before onboarding.
- 📋 Validate company codes carefully before saving feature settings.
- 🛑 Turn onboarding off immediately after initial load finishes.
- 🧭 Map required fields first to avoid sync failures.
Happy Selling!