Overview
Outlook Calendar Sync allows you to display Outlook or Office 365 calendar events alongside Followup CRM activities within the CRM Calendar.
This gives you a single view of your schedule, helping you manage availability, appointments, and CRM activities more efficiently.
⚠️ Note: Outlook events displayed in Followup CRM are read-only. To edit an Outlook event, make changes directly in Outlook.
Step-by-Step Instructions
🔗Step 1: Connect Your Outlook Calendar
- Navigate to Calendar Sync Settings.
.jpg?width=670&height=377&name=Untitled%20design%20(19).jpg)
- Select Outlook or Office 365 as your calendar provider.
- Authorize the requested calendar permissions.
- Select the calendar you want to sync.
.jpg?width=670&height=377&name=Untitled%20design%20(20).jpg)
- Save your settings.
- Return to the Calendar and verify that the sync status changes from Not Synced to a synced state.
📸 Screenshot Placeholder
📅 Step 2: View Outlook Events in the CRM Calendar
- Open the Calendar.
- Locate the Show Outlook Events toggle in the sidebar.
- Turn the toggle On to display Outlook events.
- Turn the toggle Off to hide Outlook events and display only CRM activities.
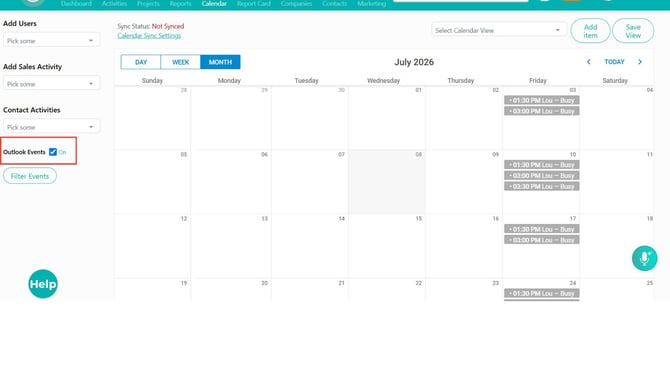
💡 Your visibility preference is saved to your user account.
🔒 Step 3: Configure Outlook Event Privacy
- Navigate to Calendar Sync Settings.
- Locate the Outlook event privacy options.
- Choose one of the following settings:
Show Full Details
Displays Outlook event titles and details.
Show as Busy
Displays blocked time without showing event details.
Hide External Events
Hides Outlook events from the CRM Calendar.
- Save your settings.
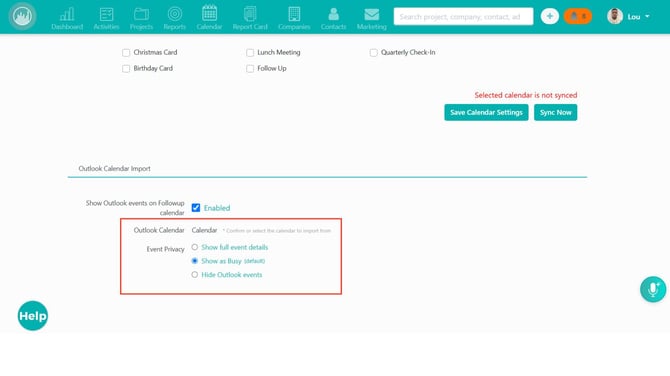
💡 Tip: Show as Busy is commonly used to protect private calendar information while still displaying availability.
✏️ Step 4: Understand Read-Only Outlook Events
Outlook events are displayed in Followup CRM for visibility only.
The following Outlook event details cannot be edited from Followup CRM:
- Event Title
- Date and Time
- Location
- Description
- Attendees
To make changes, edit the event directly in Outlook.
🧩 Step 5: Customize Calendar Event Details
- Open the Calendar.
- Open a CRM calendar event.
.jpg?width=670&height=377&name=Untitled%20design%20(21).jpg)
- Click Customize.
- Select the fields you want displayed.
.jpg?width=670&height=377&name=Untitled%20design%20(22).jpg)
Available fields may include:
- Company
- Contact Name
- Phone Number
- Deal Value
- Stage
- Priority
- Location
- Close Date
- Save your changes.
💡 Selected fields are saved to your user preferences.
🔎 Step 6: Use Custom Sidebar Filters
- Open the Calendar.
- Locate the custom filters in the sidebar.
.jpg?width=670&height=377&name=Untitled%20design%20(23).jpg)
- Enter or select filter values.
- Review the filtered calendar results.
- Clear filters when needed to display additional events.
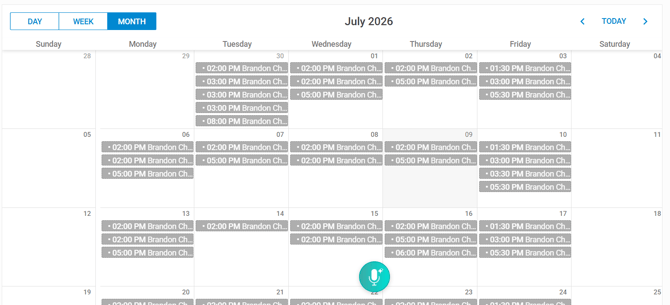
👥 Step 7: Use Calendar Views for Team Planning
Use calendar filters and saved views to manage schedules and review activity.
Available filters may include:
- User
- Sales Activity
- Contact Activity
- Saved Views
- Custom Calendar Fields
- Outlook Event Visibility
Managers can use these views to:
- Review team schedules
- Identify scheduling conflicts
- Monitor activity coverage
- Prepare for pipeline reviews
Result
You can now view Outlook events alongside Followup CRM activities, manage event visibility and privacy settings, customize calendar details, and use filters to improve scheduling and planning workflows.
Best Practices
💡 Use Show as Busy to protect private Outlook event details while displaying availability.
💡 Turn off Outlook events when focusing solely on CRM activities.
💡 Edit Outlook events directly in Outlook rather than attempting to update them from Followup CRM.
💡 Use saved views for recurring team and management workflows.
💡 Display only the custom fields you use frequently to keep the Calendar sidebar organized.
💡 If events appear to be missing, review your date range, filters, saved views, permissions, and Outlook visibility settings before reconnecting your calendar.
Happy Selling!