You will need administrative access to add, edit, or delete a user. To get started click on the Company Settings in the top right drop-down. Then click on People.
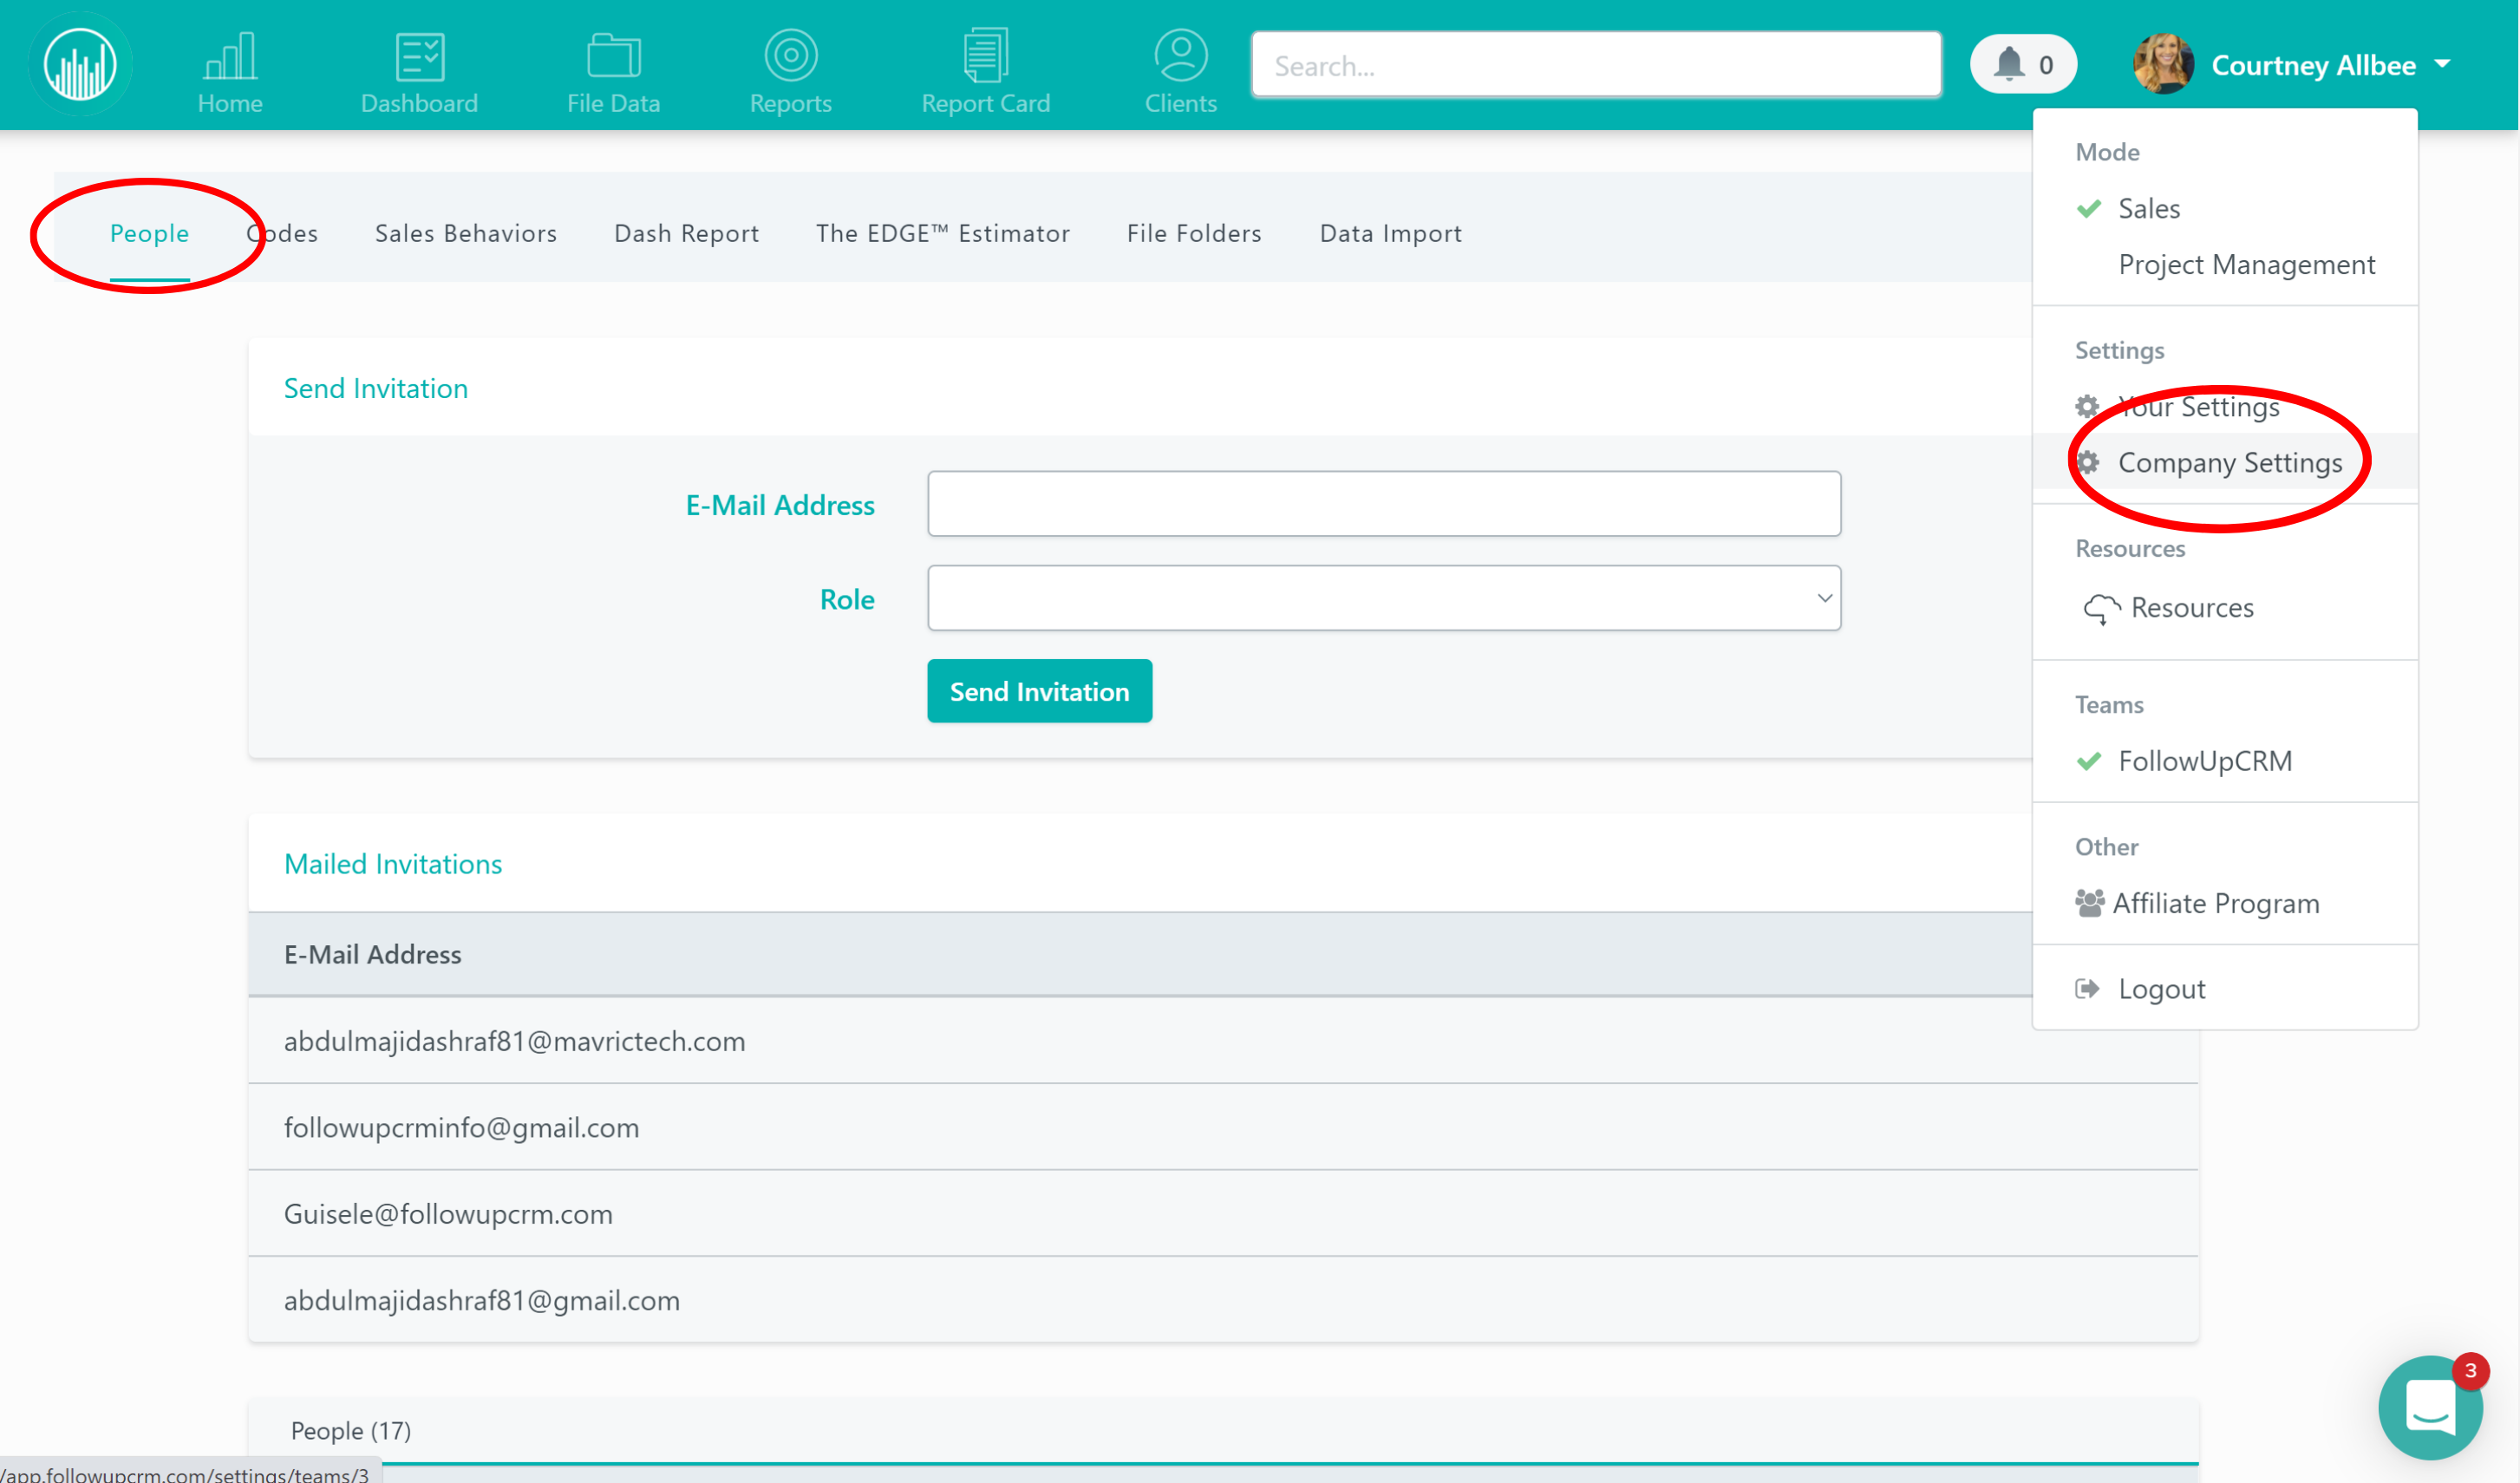
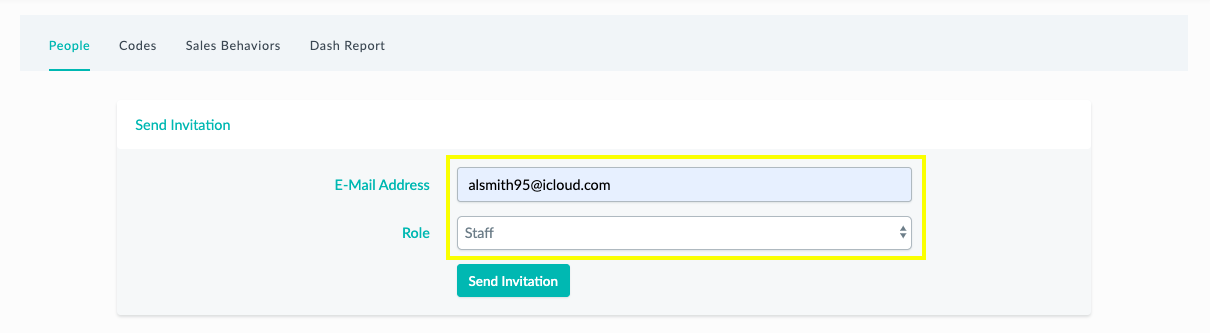
Next enter the email and role of the user you’d like to add.
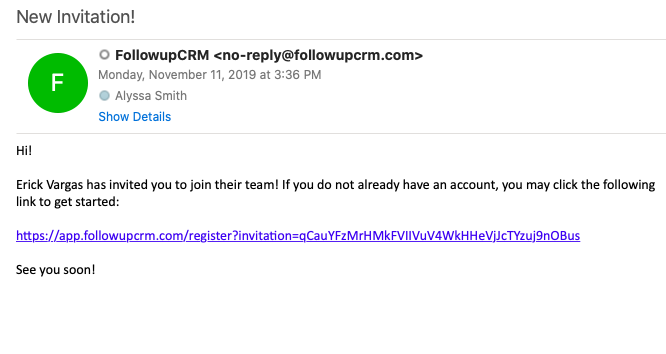
The user will get an email with a link to join. Click the link to register.
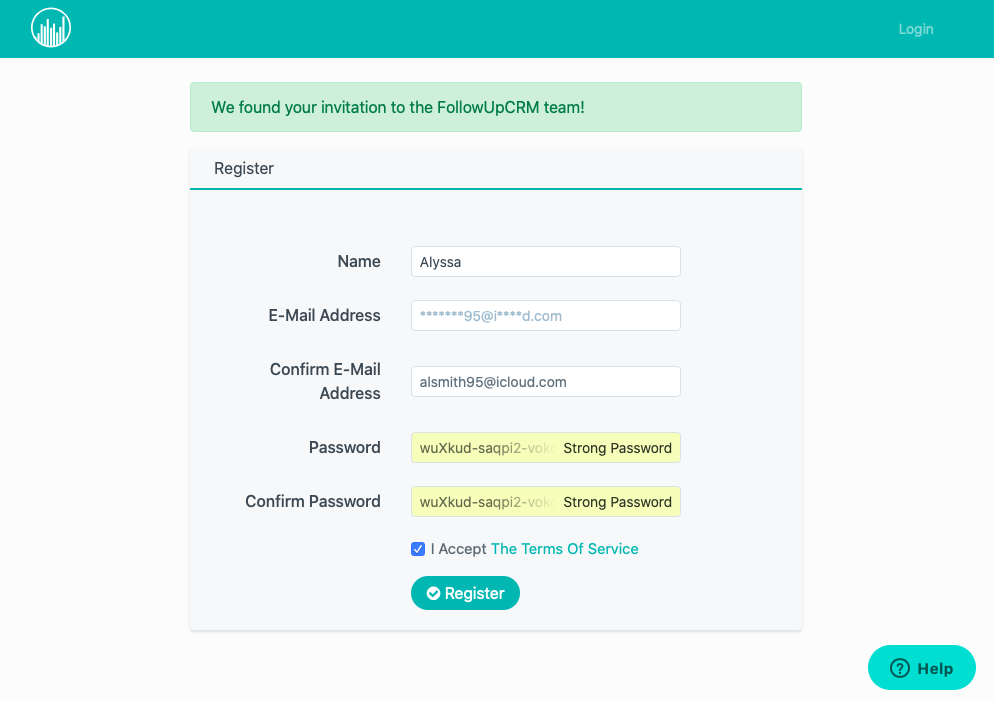
Once the user clicks the link, they will be prompted to create a password. Click Register when completed.
The new user will now appear in the People tab, where you can edit their permissions:
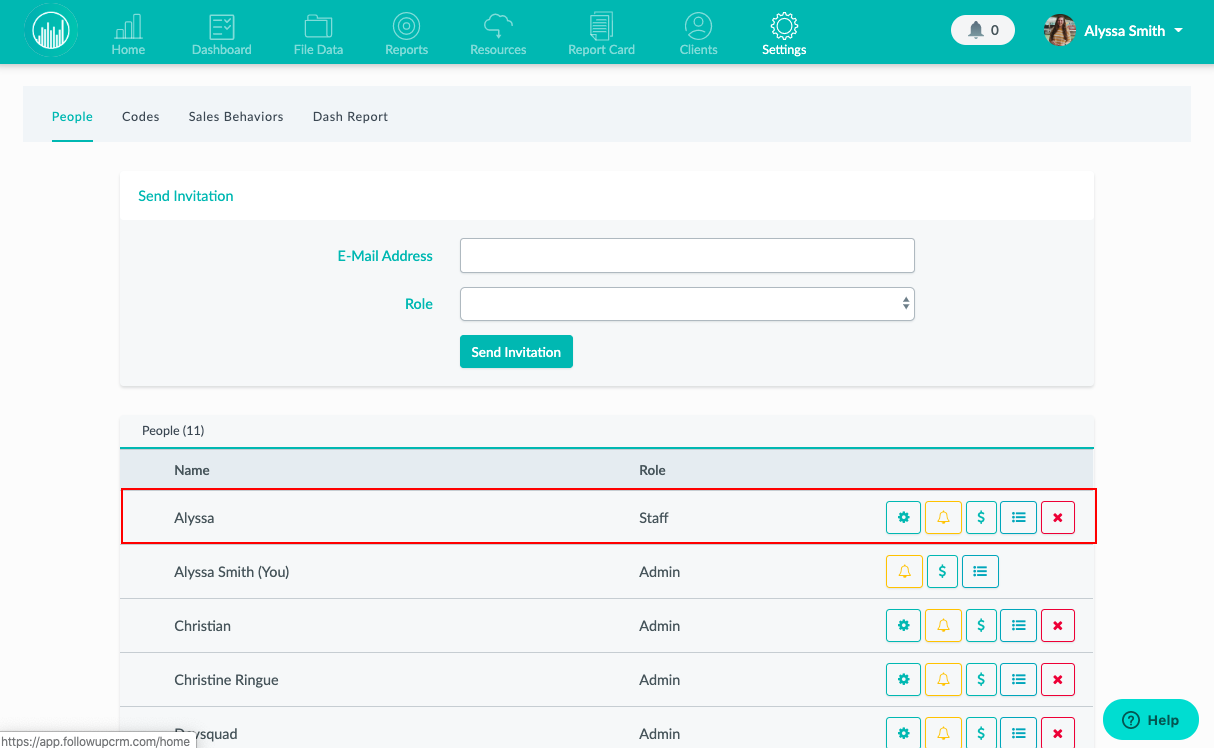
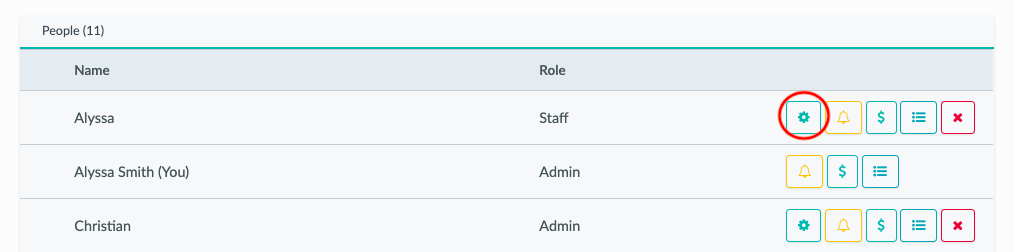
To edit the role of the staff click the first icon:
When choosing License Level there are four options defined for you below to choose from
Administrator- Full access
Senior Manager- No access to back end. Has full visibility into company sales and can export into excel
Manager- No access to back end. Has full visibility into individual reports of who “reports to them”. Cannot export into excel.
Staff- No access to back end. Has visibility into personal, files and reports; cannot export into excel
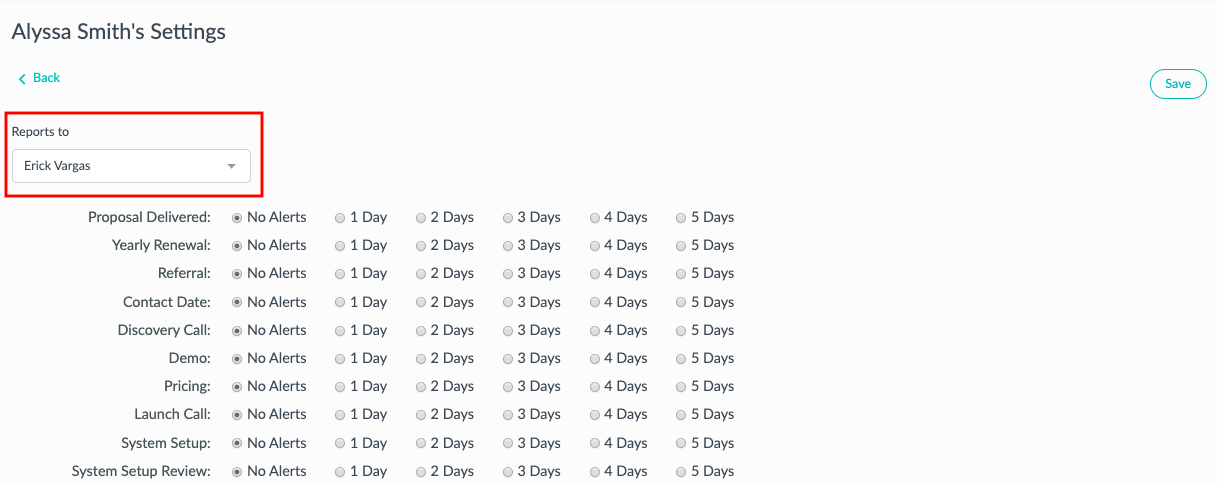
*Manager – in order to receive accountability alerts, managers need to be assigned to every user.
To edit who this user reports to, click the yellow bell icon:
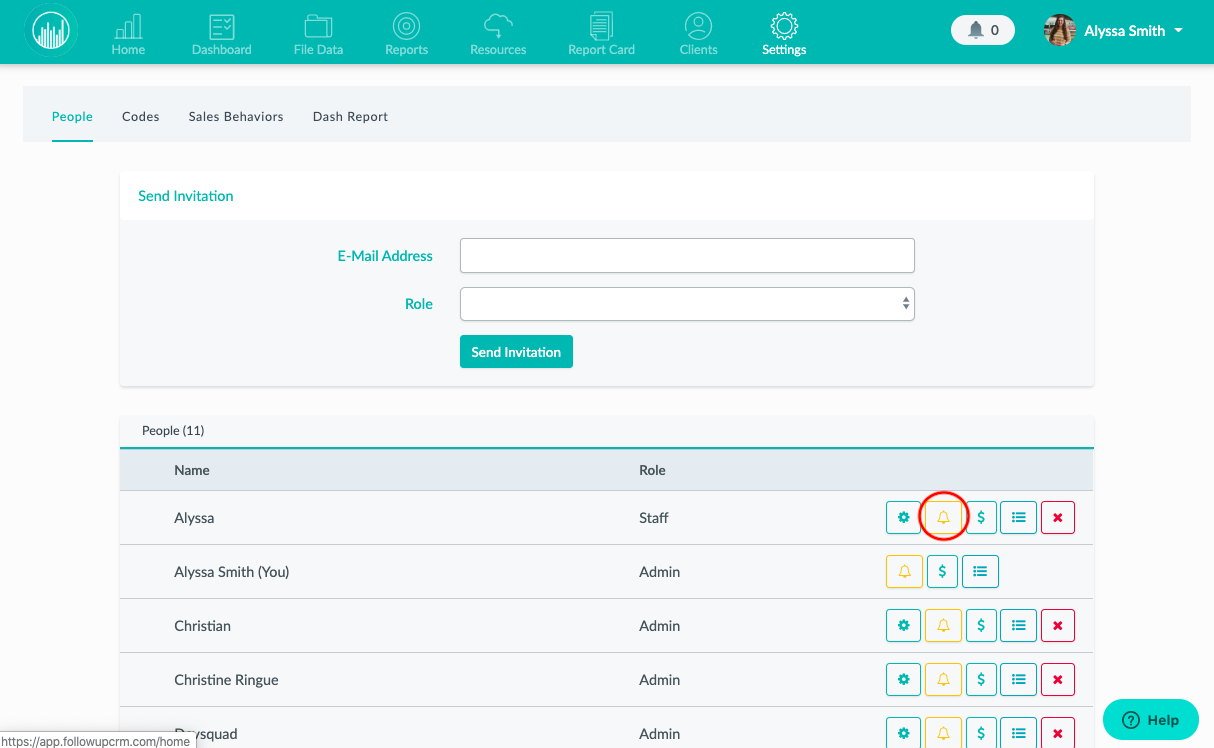
In these notification settings, you can choose who this user will report to from a drop down menu. Here you can set up notifications for the manager. These notifications will go to the user selected in the “reports to” area. The days refer to how many days late the activity is:
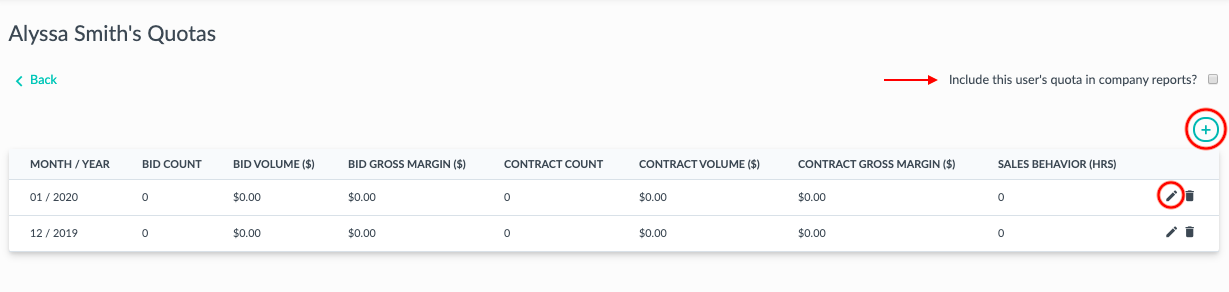
To edit a user’s quotas click the dollar sign icon:
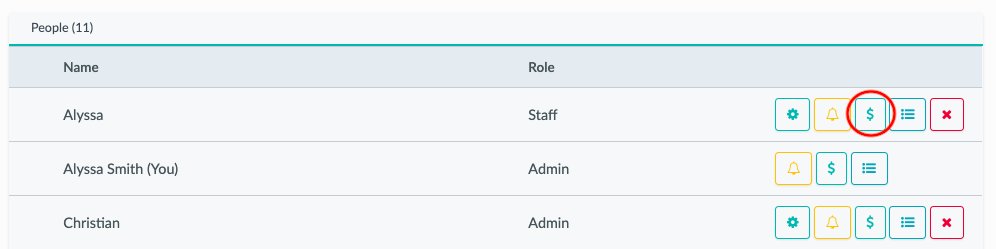
From here you can add new quotas, edit current quotas, and choose whether to include the user’s quota in the company reports.
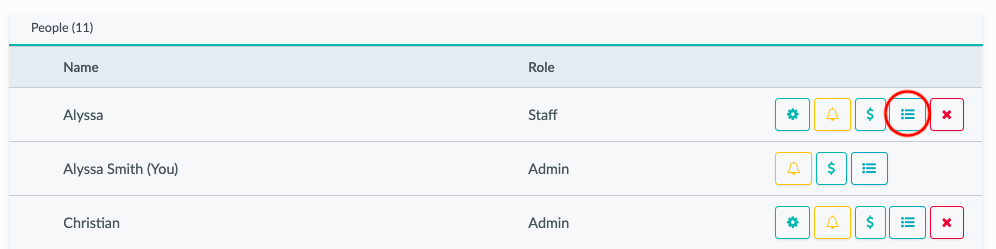
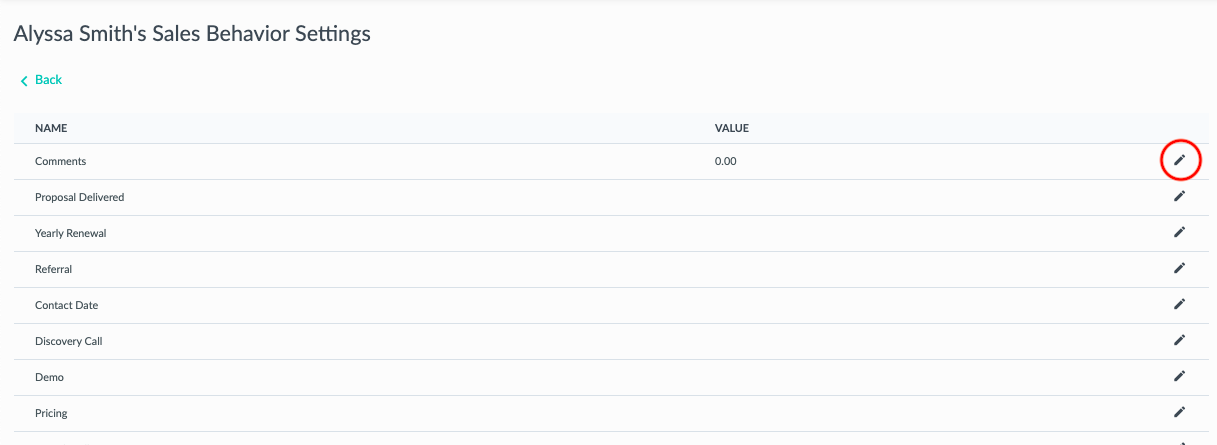
To edit a user’s sales behavior settings click the list icon:
Here you can edit the value for each sales behavior by clicking the pen icon:
*The value number gives credit for each activity (i.e. 1 hour for each Demo activity) to the salesperson.
 Did this answer your question?