Note: This guide is tailored for general users. If you encounter any technical challenges, please contact your IT administrator or reach out to support@followupcrm.com.
✅ Prerequisites
Before you begin, make sure you have:
-
Administrator access to Sage 300 CRE
-
Access to the Sage 300 CRE server
-
The ODBC driver installed for Sage 300 CRE
-
The Agave Connector installer (available from support@followupcrm.com)
🔧 Step-by-Step Setup Guide
Step 1: Install the Agave Connector
Contact support@followupcrm.com to request the Agave Connector installer for Sage 300 CRE.
Once you receive the installer:
-
Log into the Sage 300 CRE server
-
Run the installer and complete setup
-
Launch the Agave Connector (you’ll see the shortcut on your desktop)
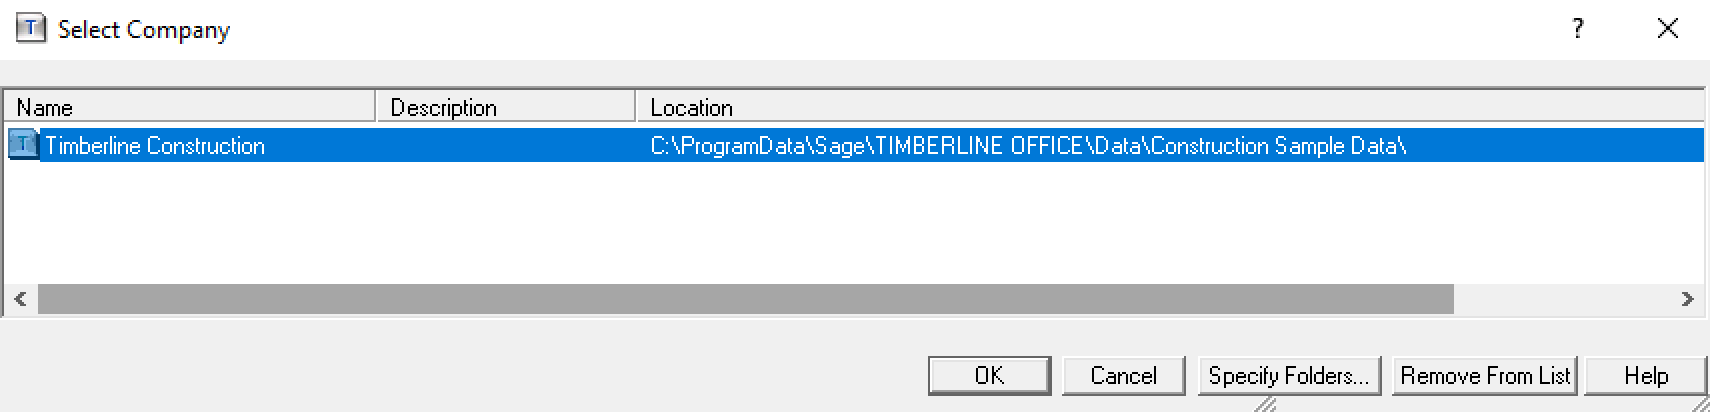
Step 2: Find Your Sage 300 CRE Company Path
You’ll need the file path for your company database.
-
Open Sage 300 CRE
-
In the Select Company window, copy the path shown in the Location column
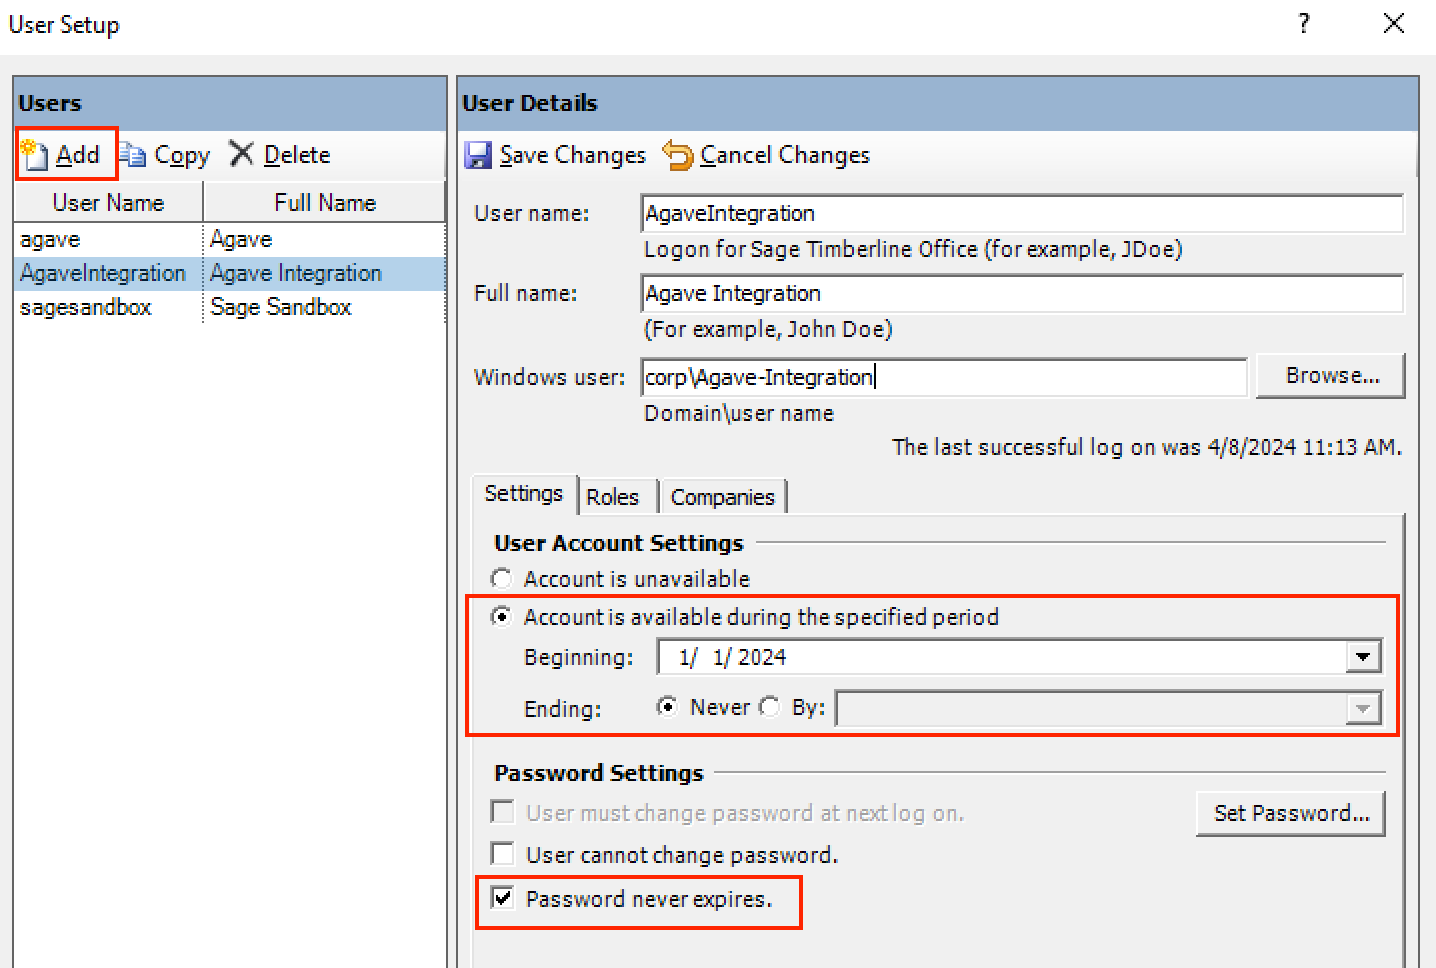
Step 3: Create a New Sage 300 CRE User
To authorize the Agave Connector:
-
Open Options > Security Administration in Sage 300 CRE
-
Click Add User and create a user (e.g.,
agave_user) -
Assign a password and apply appropriate roles
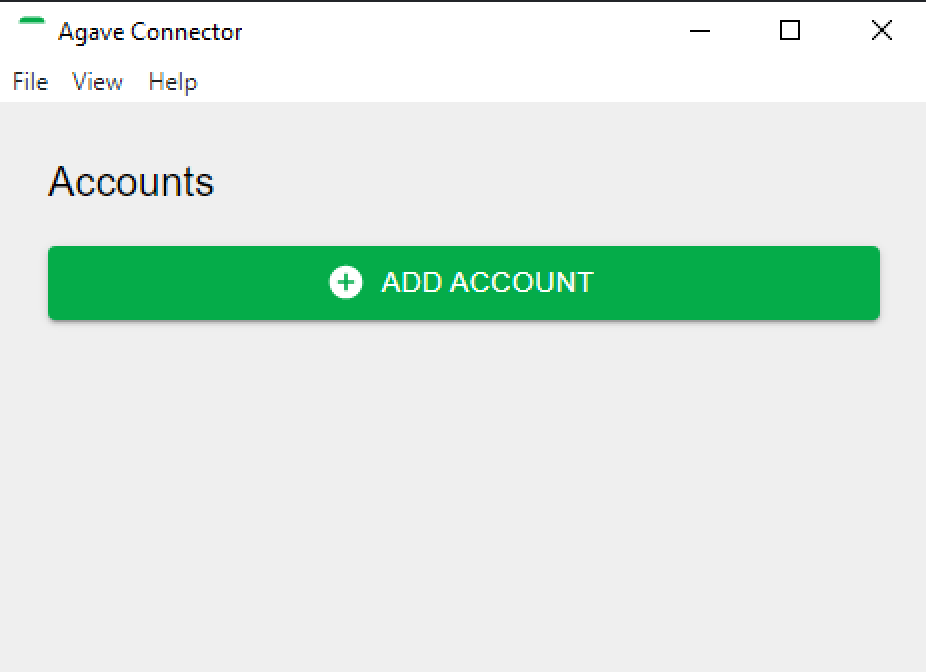
Step 4: Add Your Sage 300 CRE Account in the Agave Connector
-
Open the Agave Connector
-
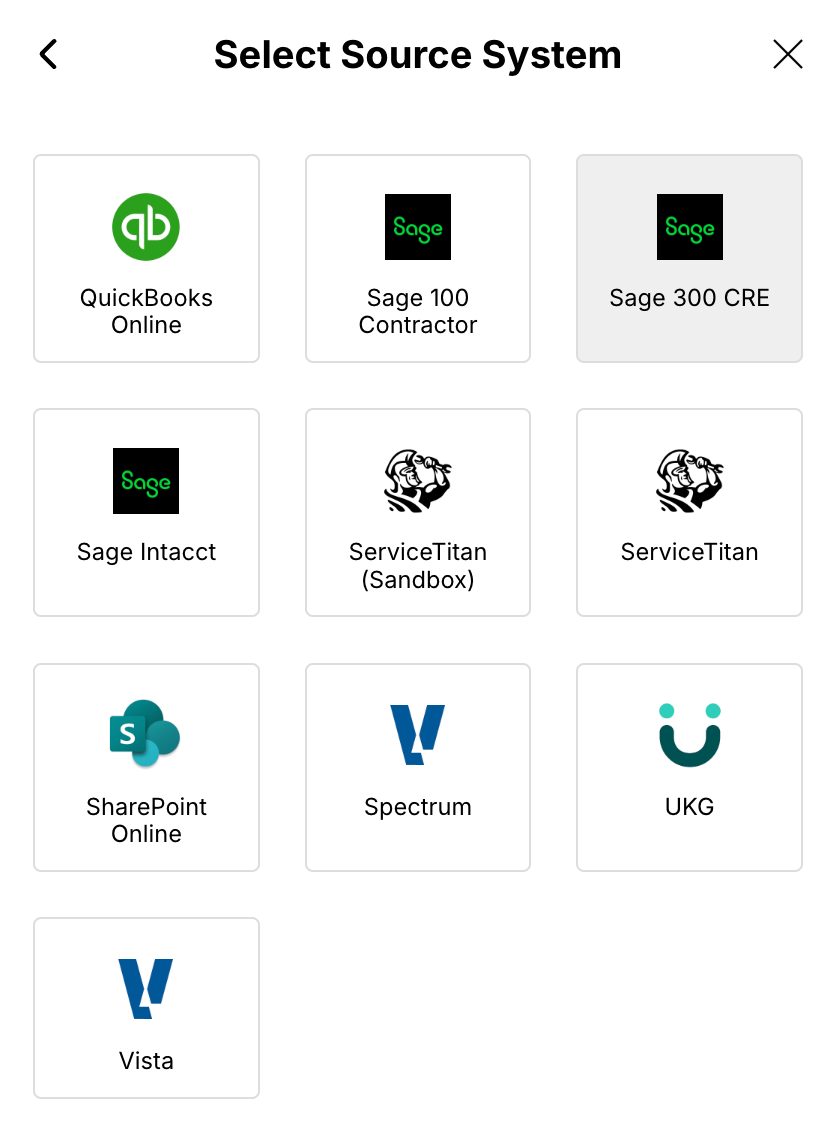
Click Add Account and select Sage 300 CRE as the system
-
In the database configuration window, fill in:
-
Database Path: The path from Step 2
-
Username: The Sage user created in Step 3
-
Password: The associated password
-
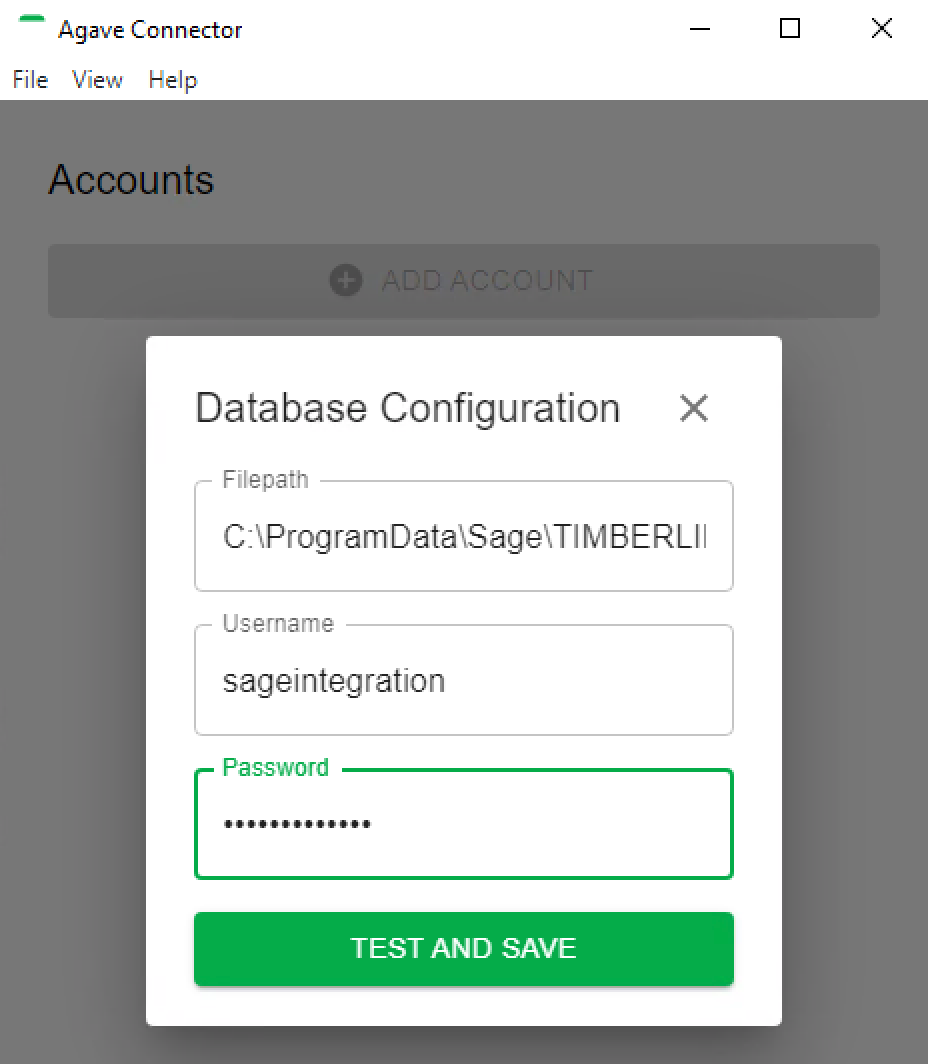
Click Test and Save.
Step 5: Authenticate with Followup CRM
Now, connect your Sage 300 CRE account to Followup CRM:
-
In Followup CRM, go to Settings > Integrations > Sage 300 CRE
-
Click Connect to generate your Account ID and Token
-
Return to the Agave Connector and enter those credentials
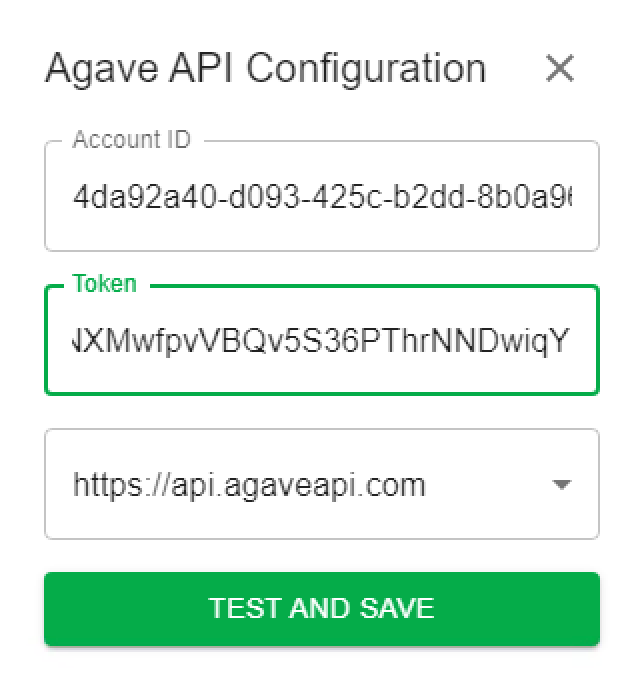
Click Test and Save to validate the connection.
Step 6: Keep the Connector Running
For the integration to work continuously, keep the Agave Connector running on the Sage server. You can also set it to auto-start with Windows for convenience.
🧩 Common Issues & Troubleshooting
| Issue | Solution |
|---|---|
| ODBC driver missing | Install the correct version for your system (32-bit or 64-bit) |
| Connection failed | Verify database path, username, password, and token |
| No data syncing | Ensure the Agave Connector is open and Sage 300 is accessible |
❓ Frequently Asked Questions
Q: Do I have to keep the Agave Connector running?
A: Yes — it must stay open for data to sync.
Q: Can I connect more than one Sage 300 company?
A: Yes. You can add multiple accounts in the Agave Connector.
Q: Does Followup CRM write data to Sage?
A: Yes, depending on your permissions, it can read from and write to Sage 300 CRE.
📩 Need Assistance?
Our team is here to help!
📧 Email: support@followupcrm.com