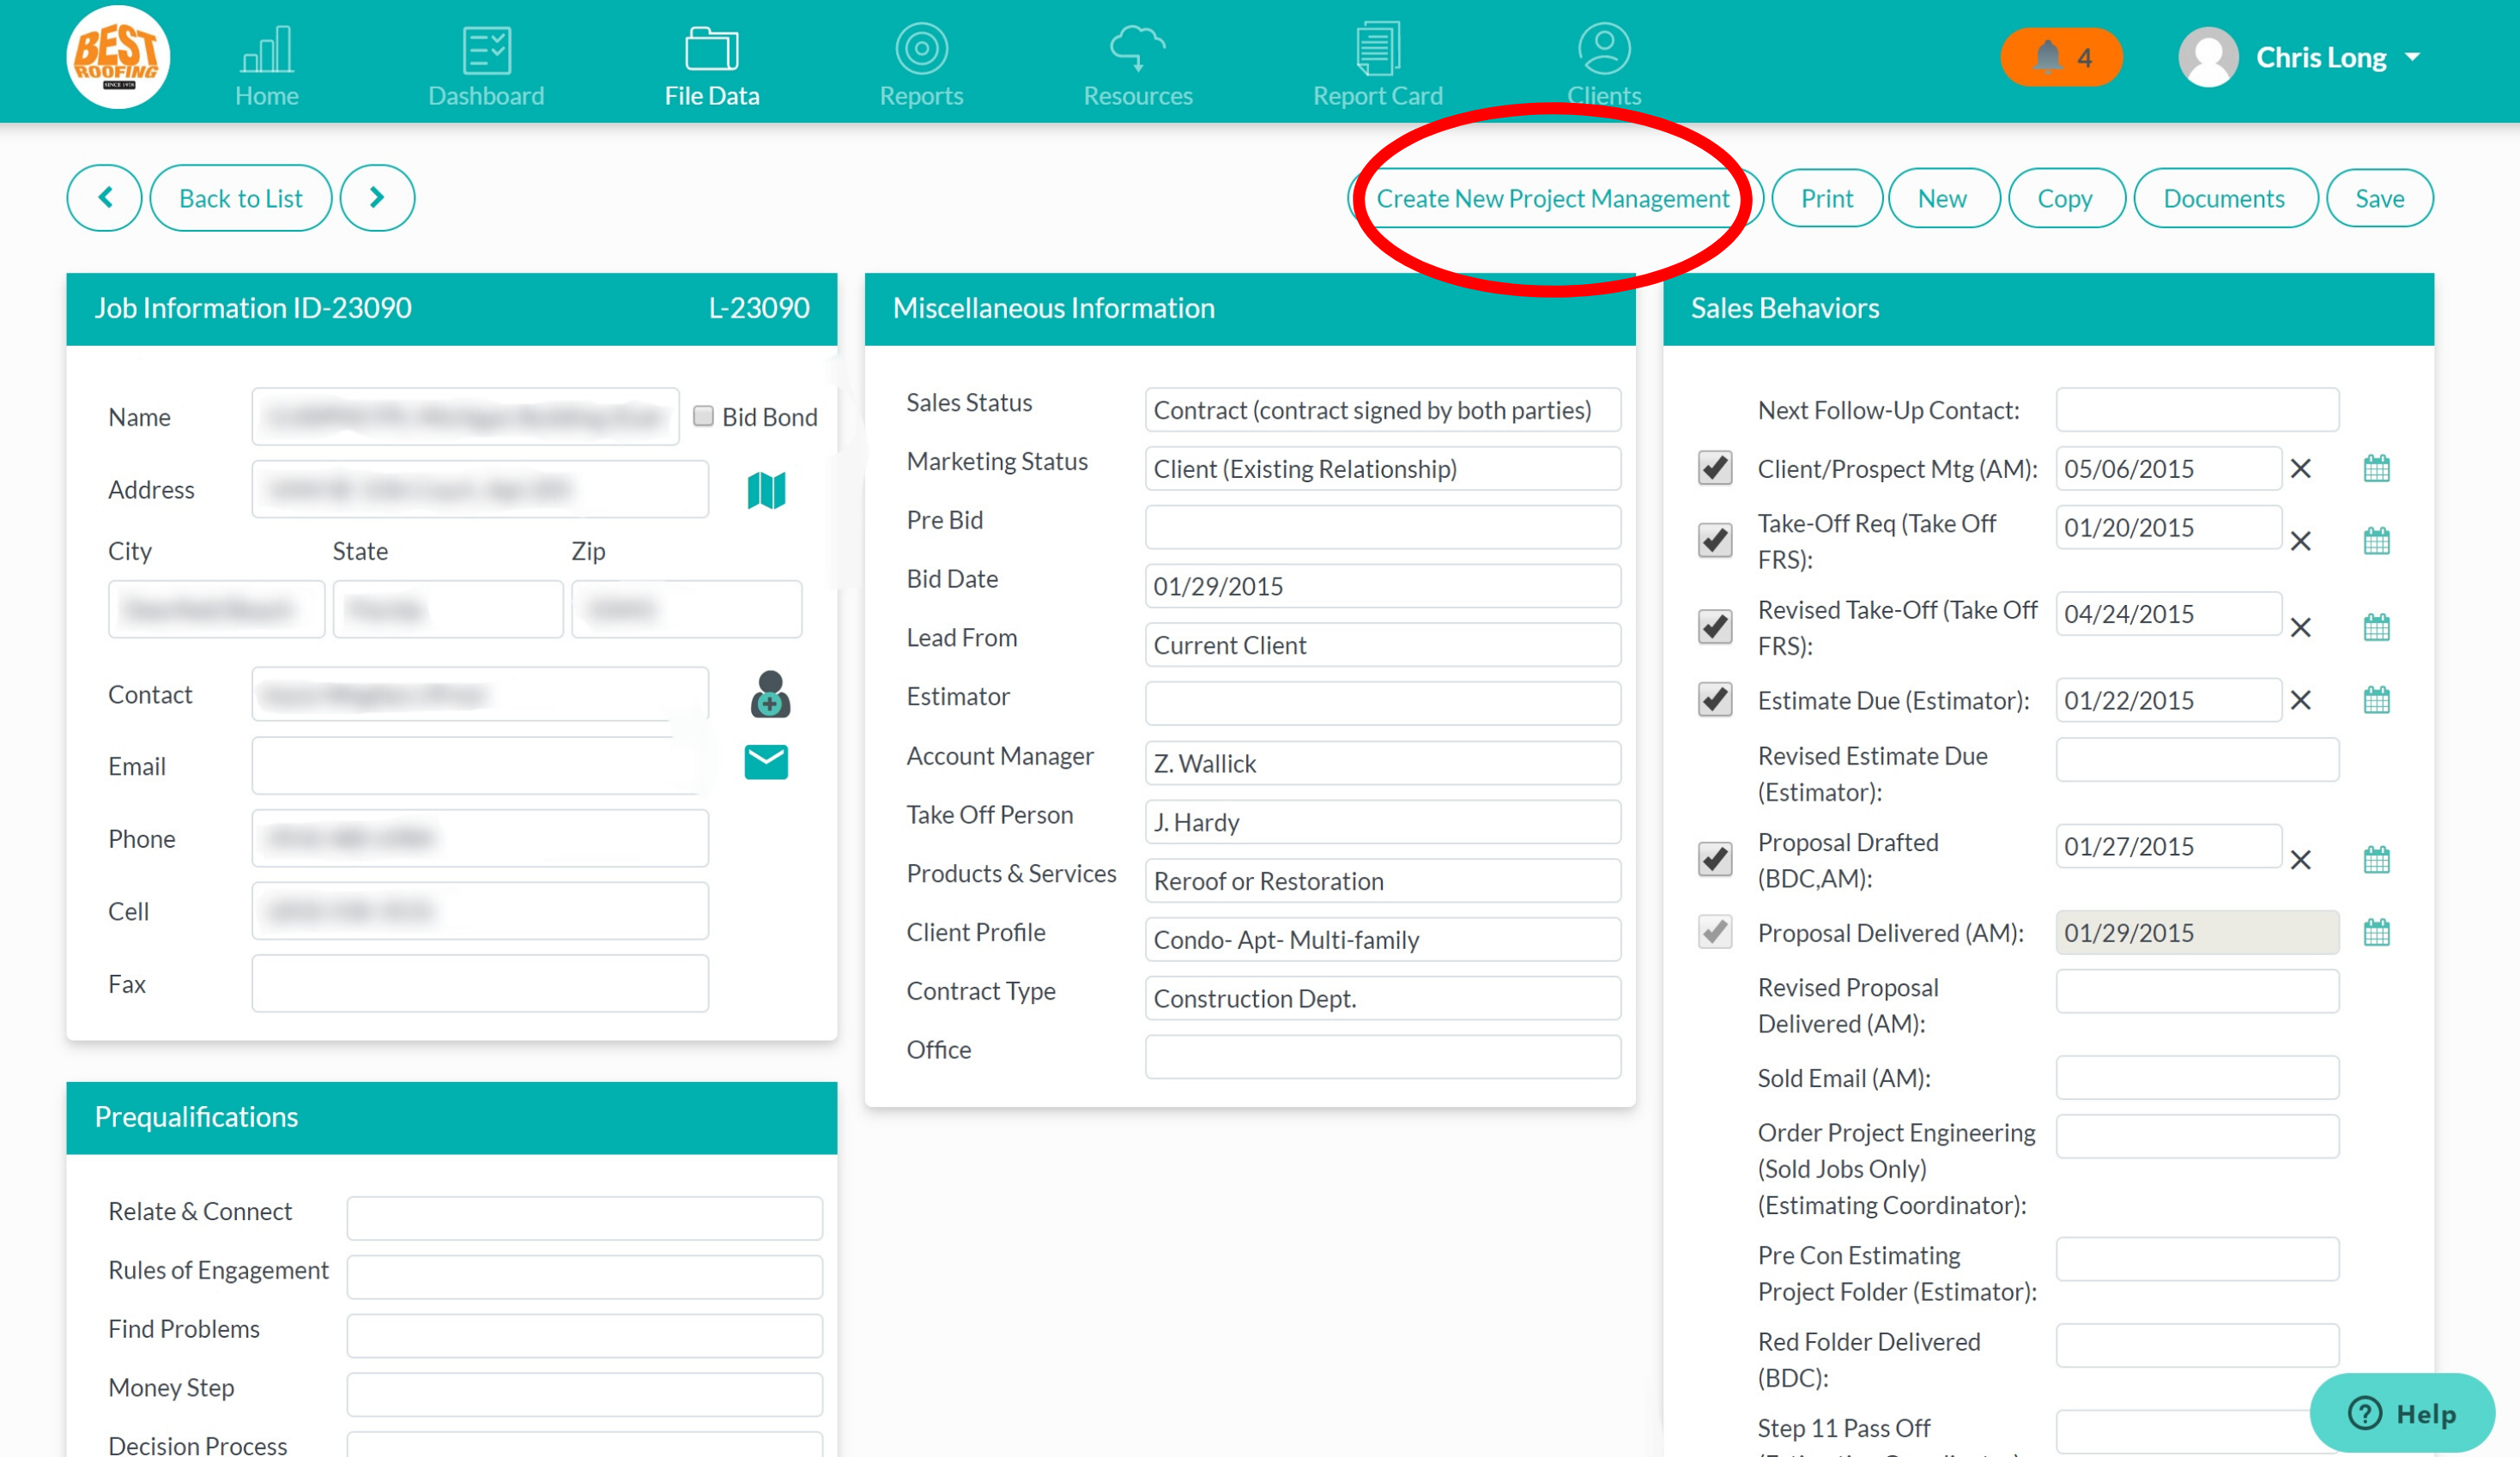
Once you have a completed contract, you have this new project management button in the top right corner. Once you click on this, it creates a project management file that looks very similar to the files in the sales side of our software. However, you’ll notice that the main colors of the page change to black, making it apparent you have switched over to the project management side of the tool, but with the same familiar functionality.
In your project management file, it automatically pulls the information from your sales file that you previously filled out, such as the project name, address, contact name, etc. The project management tool also includes different drop downs in the miscellaneous section specific to your project. This also includes project management behaviors, which is similar to our sales behaviors.

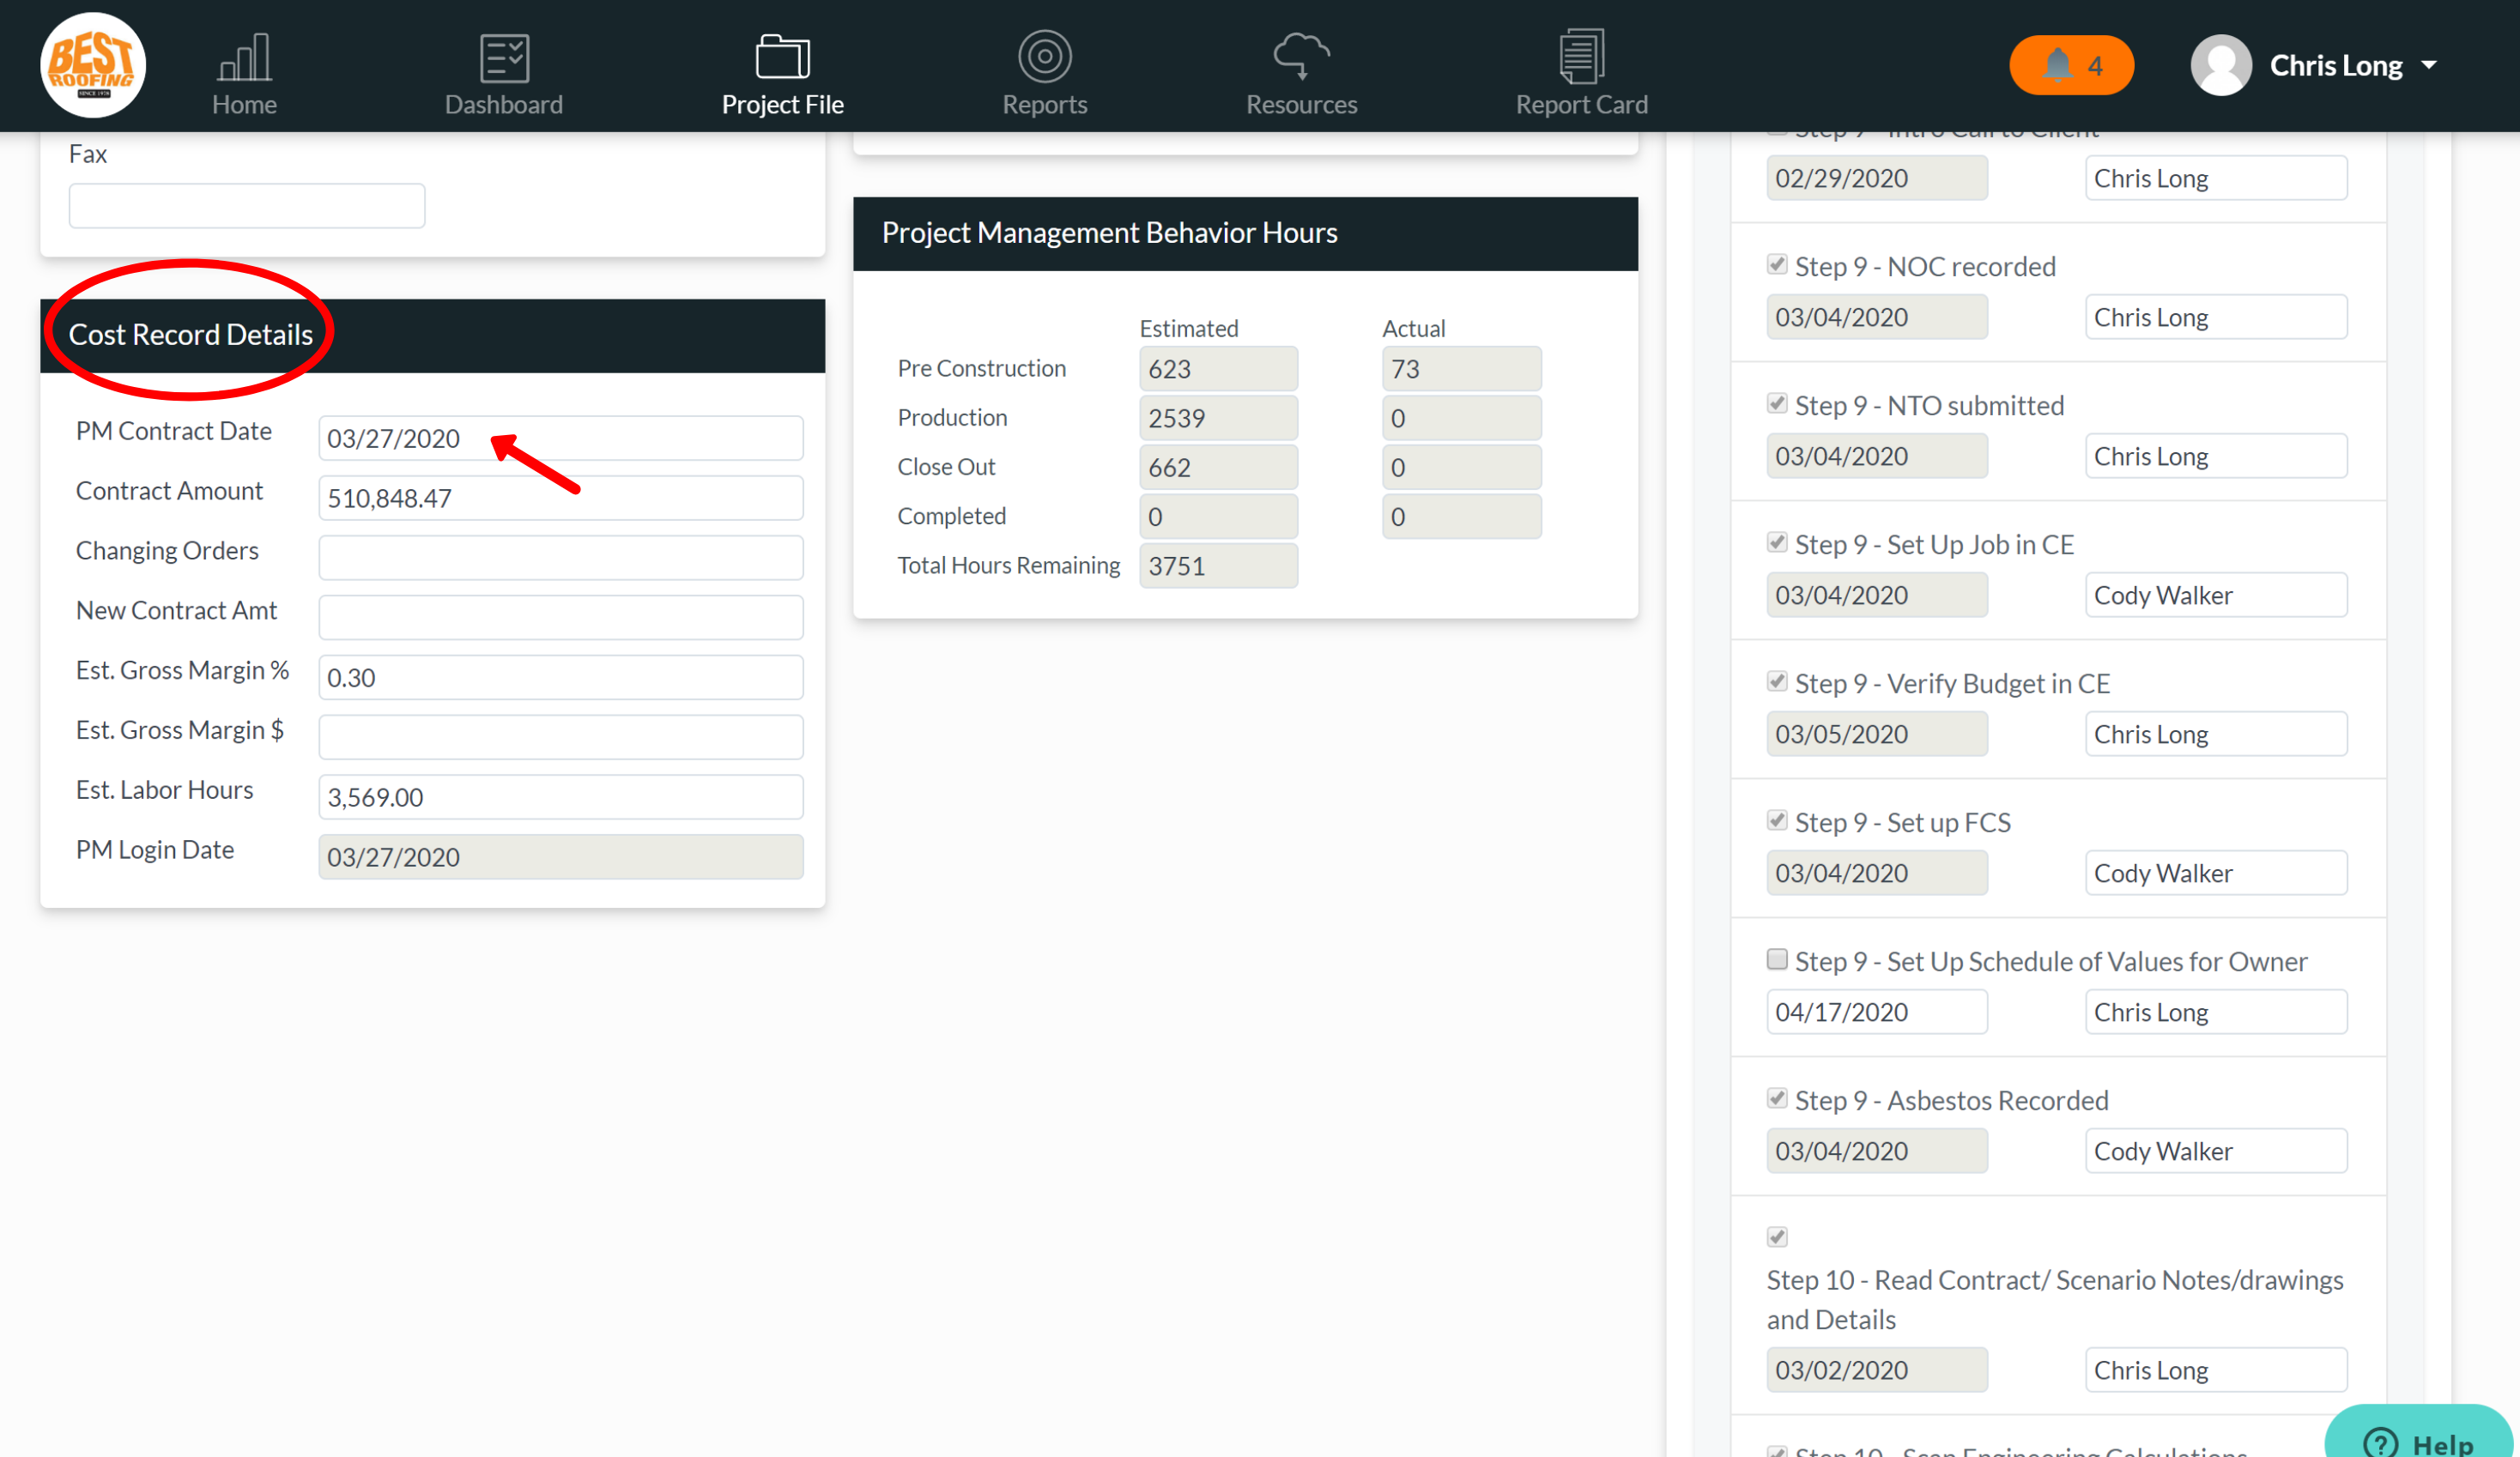
Underneath the job information tab, we have the record details. The record details is going to pull over the contract date and contract amount from the sales file. The very first thing you need to do when setting up a new project management file is to determine when you want your pre-construction activities to begin. Once you determine that date, you will need to adjust the date in the PM contract date field to that specific date. It’s important to set this up because this is what’s going to trigger the dates for each item under the Project Management Behaviors section. This allows you to keep track of the schedule for all your pre-construction, production, and close-out activities.
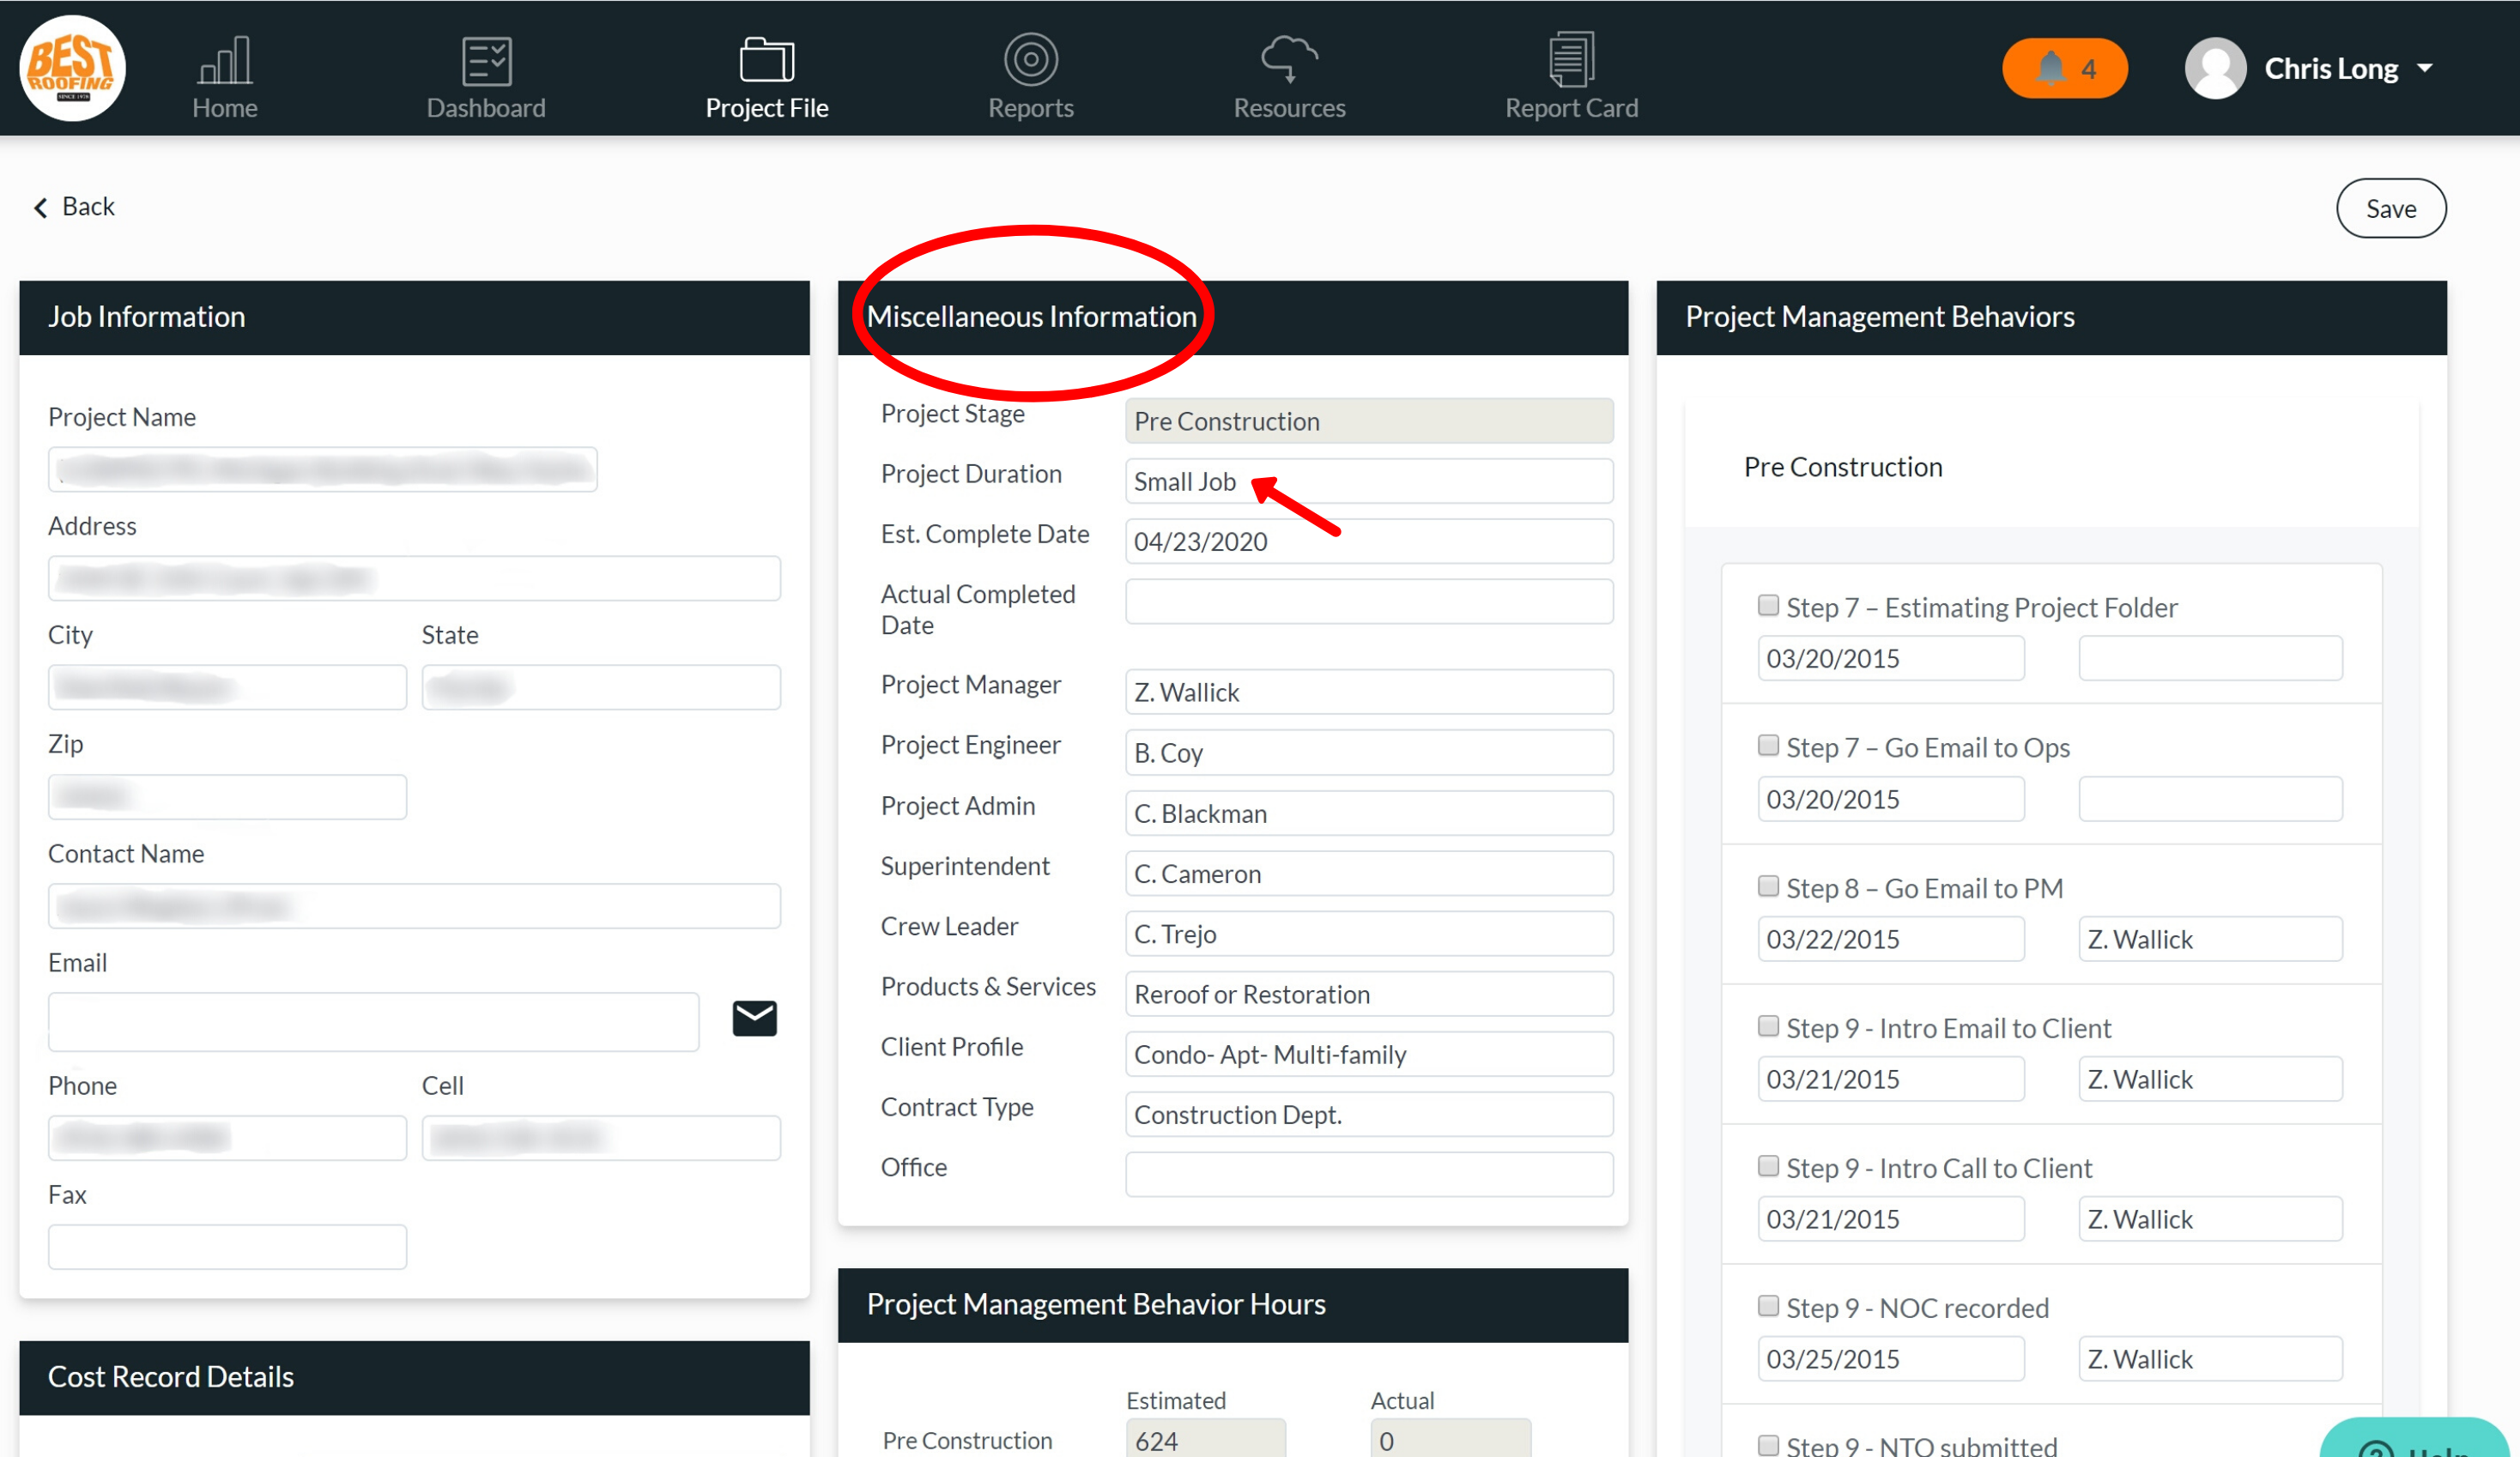
Next, you’ll want to jump over to the miscellaneous information section and select the project duration. For most users, this would be either a small, medium or large project. Other users who offer multiple types of service types may have the option to select more specific durations such as repairs, residential, commercial, tile, etc. The project durations are customizable and something that you will set up in the back end. We recommend keeping it simple when setting this up and using “small,” “medium,” and “large” for this field.
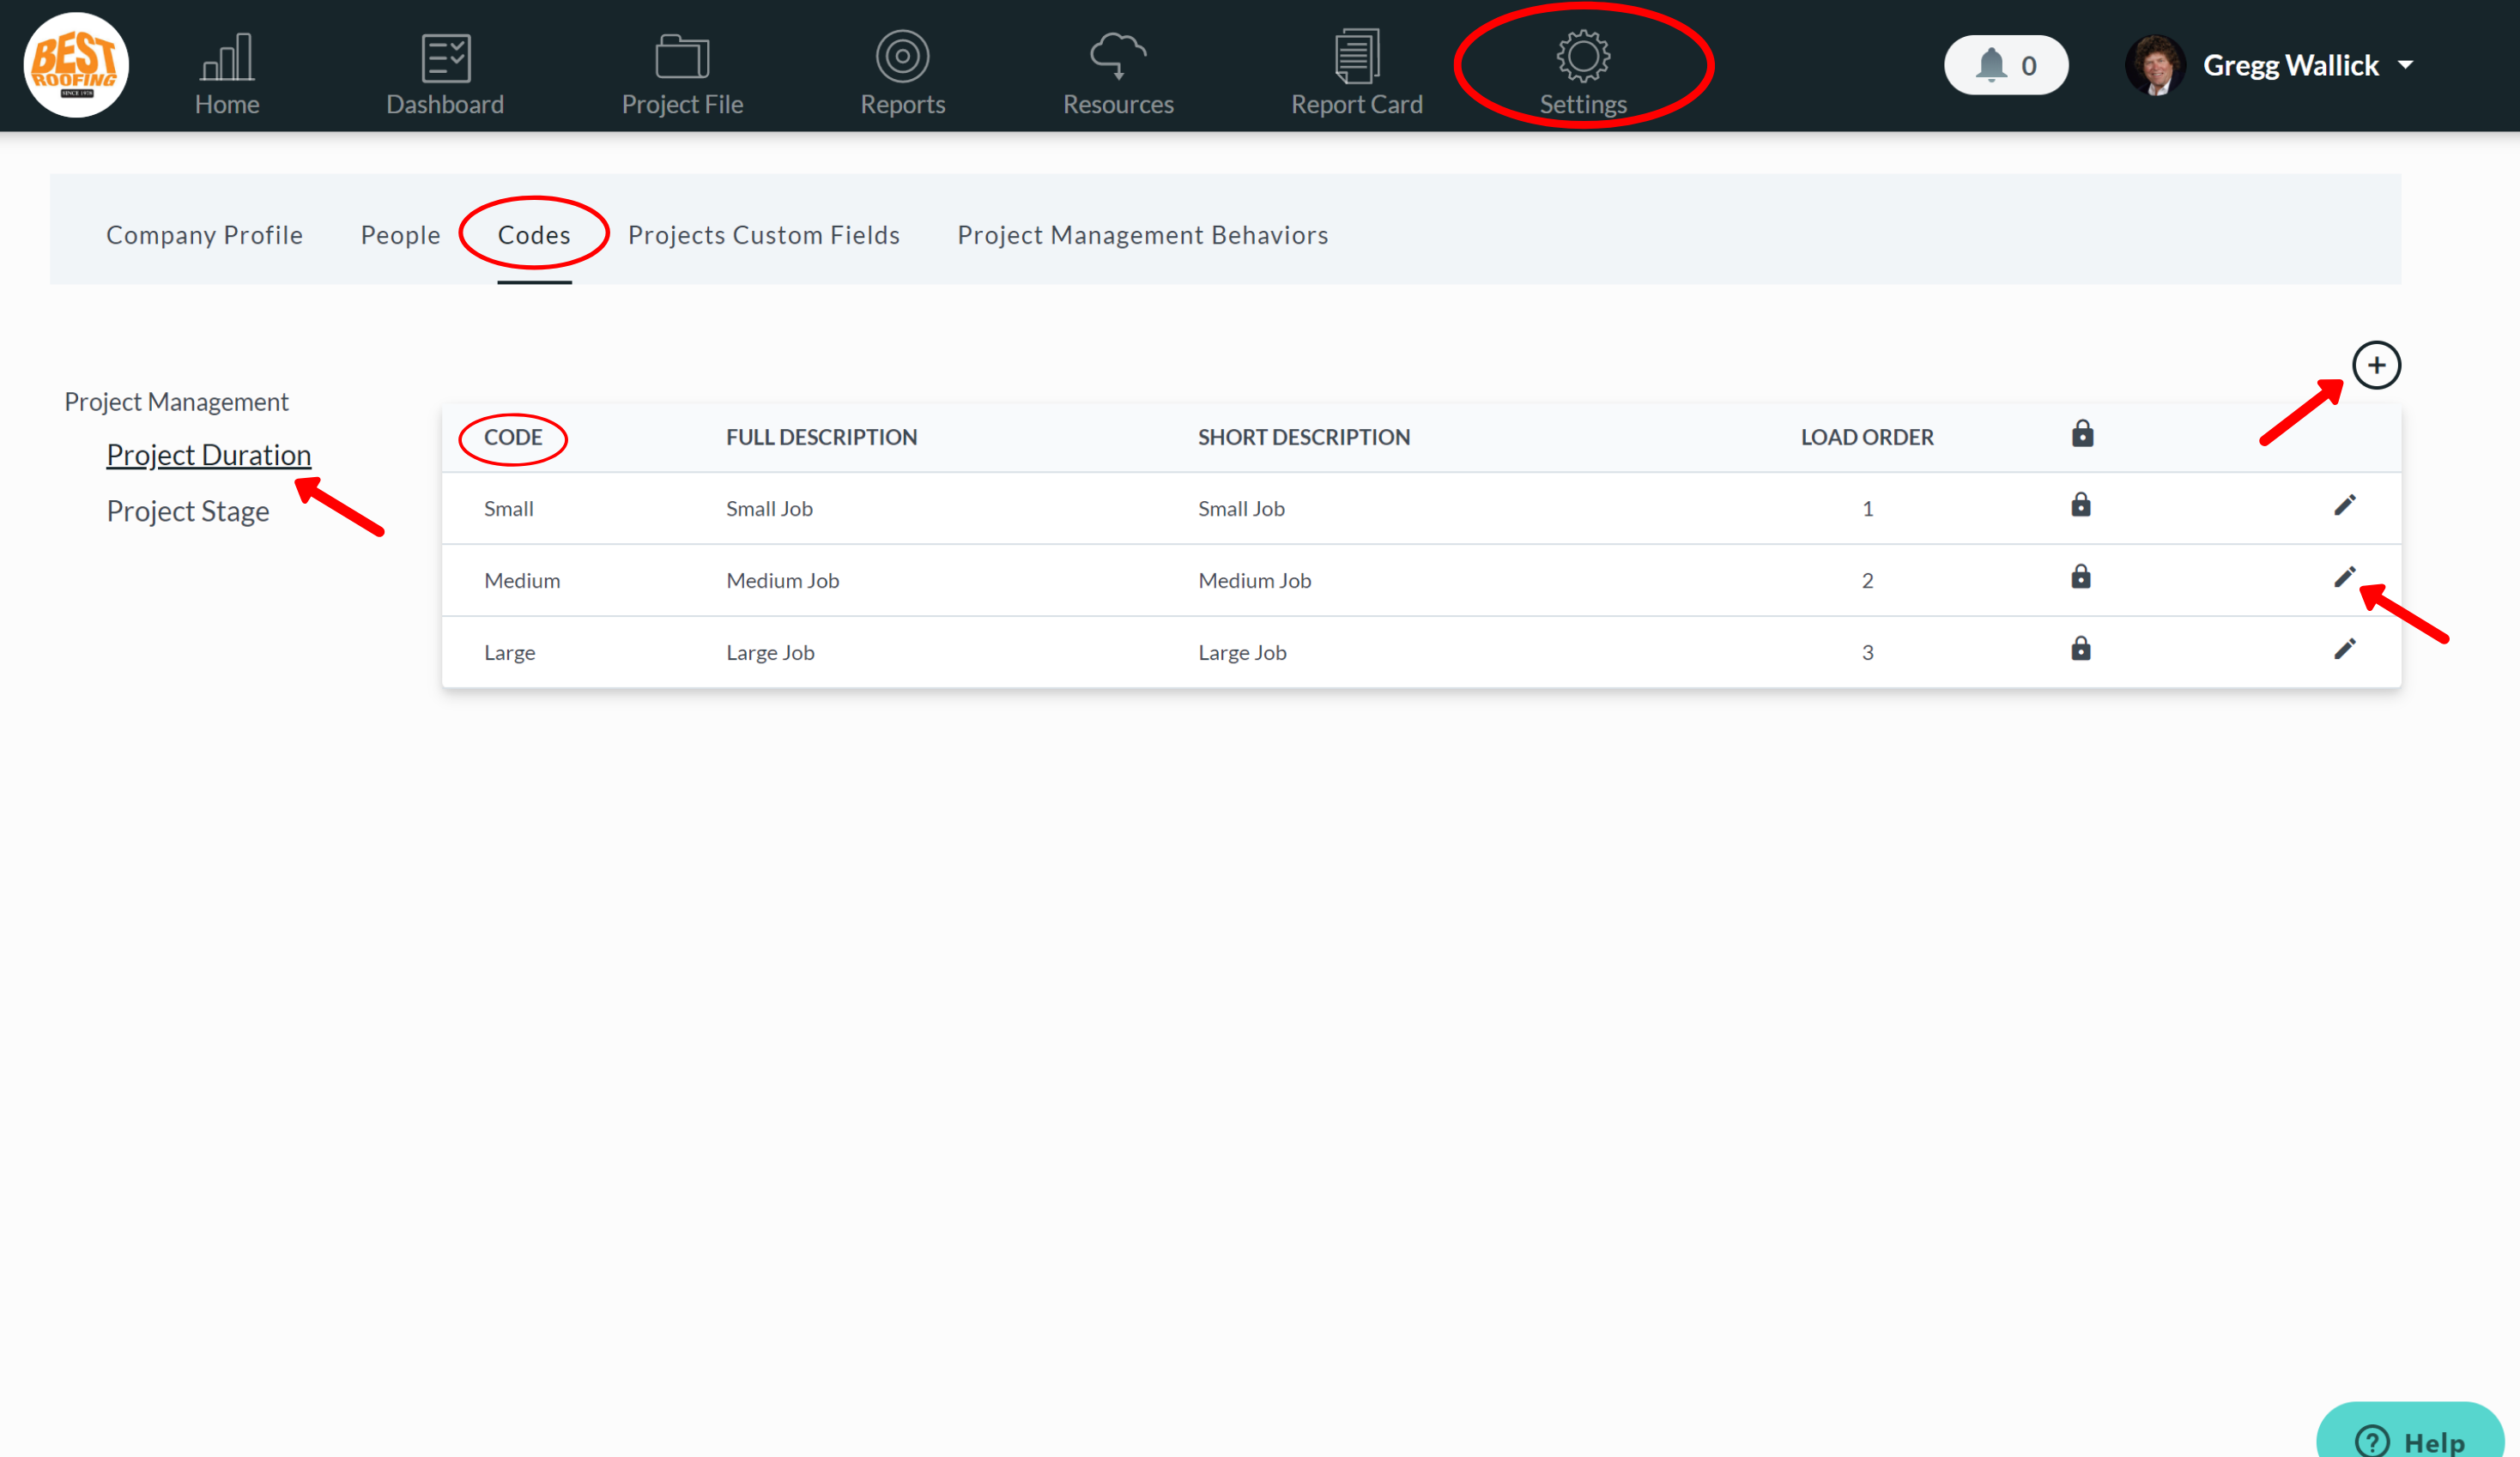
To set up the project durations, you’ll need to go to settings and click on codes. From here, you can add a new project duration code by clicking the plus icon in the top right corner. You can also edit existing project durations by clicking on the pencil icon.
Once you’ve selected the project duration, you’ll need to assign the job titles to the corresponding users. This will automatically assign the tasks listed in the project management behaviors section to the tasks they are responsible for completing. For example, if Bob Smith is the Project Manager you assigned in the miscellaneous information section, he will automatically be assigned to the tasks in the project management behaviors section such as the intro email to the client, recording the NOC, and any other tasks the project manager is responsible for completing.
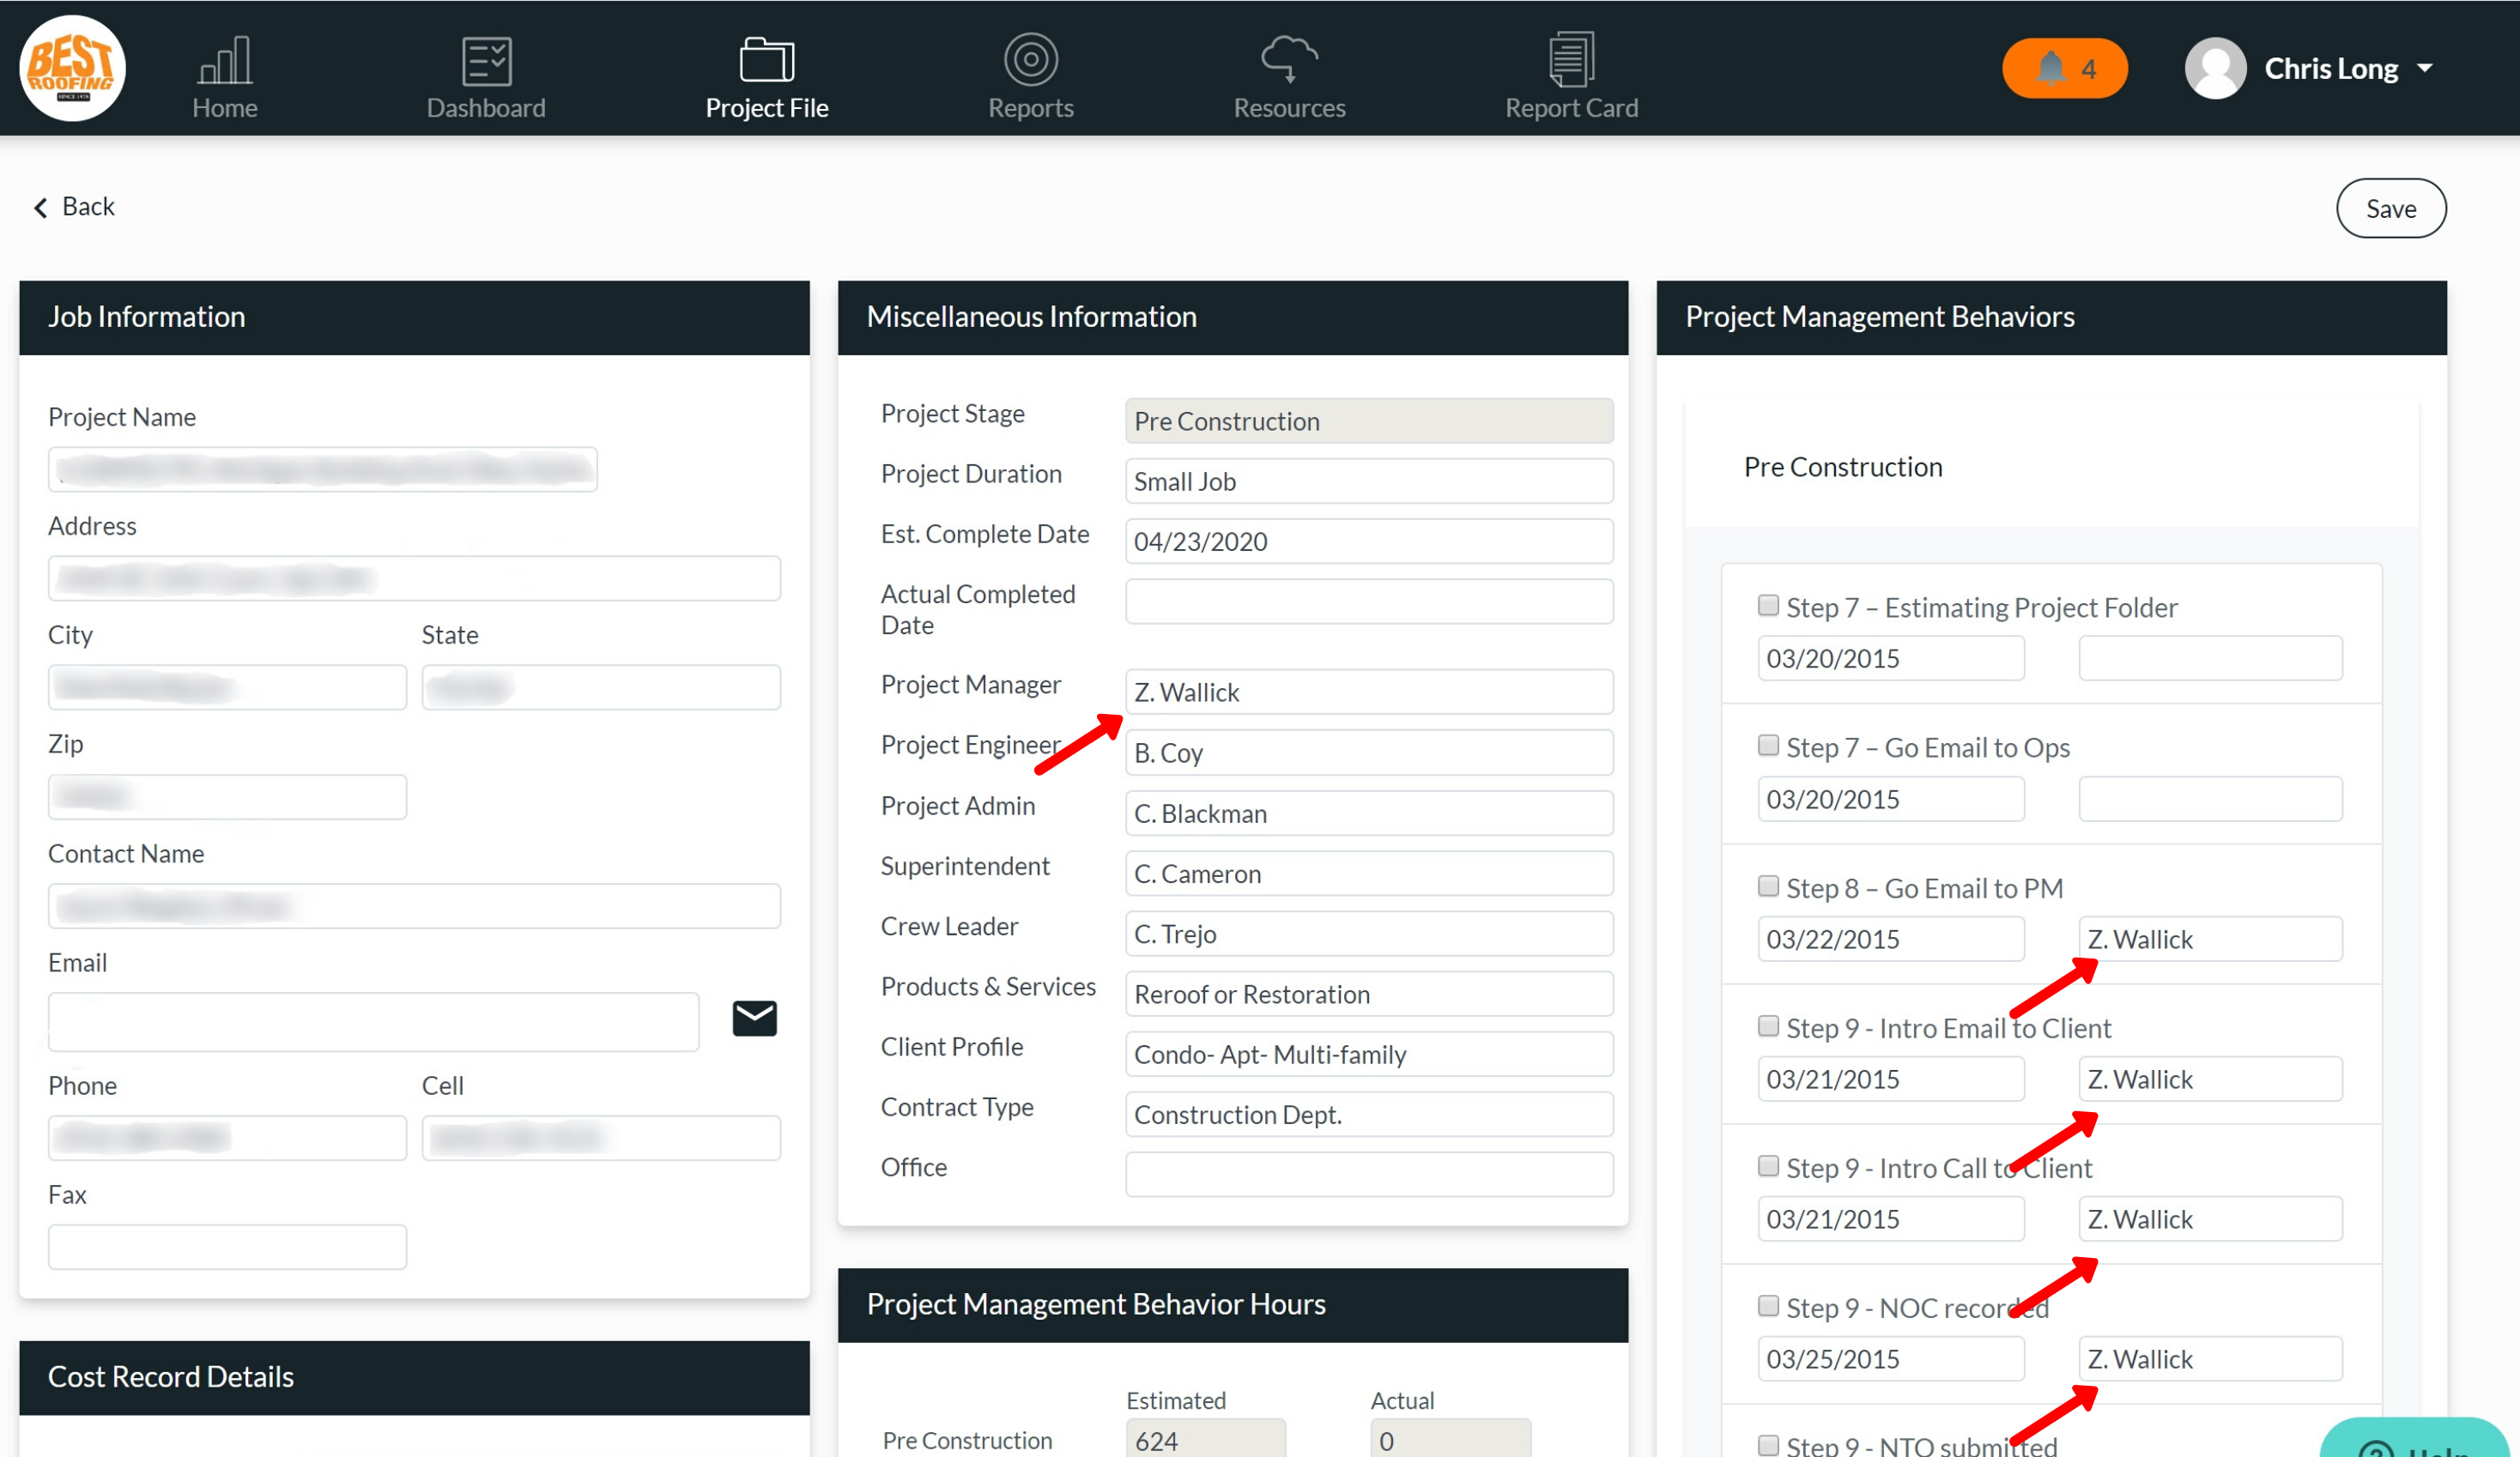
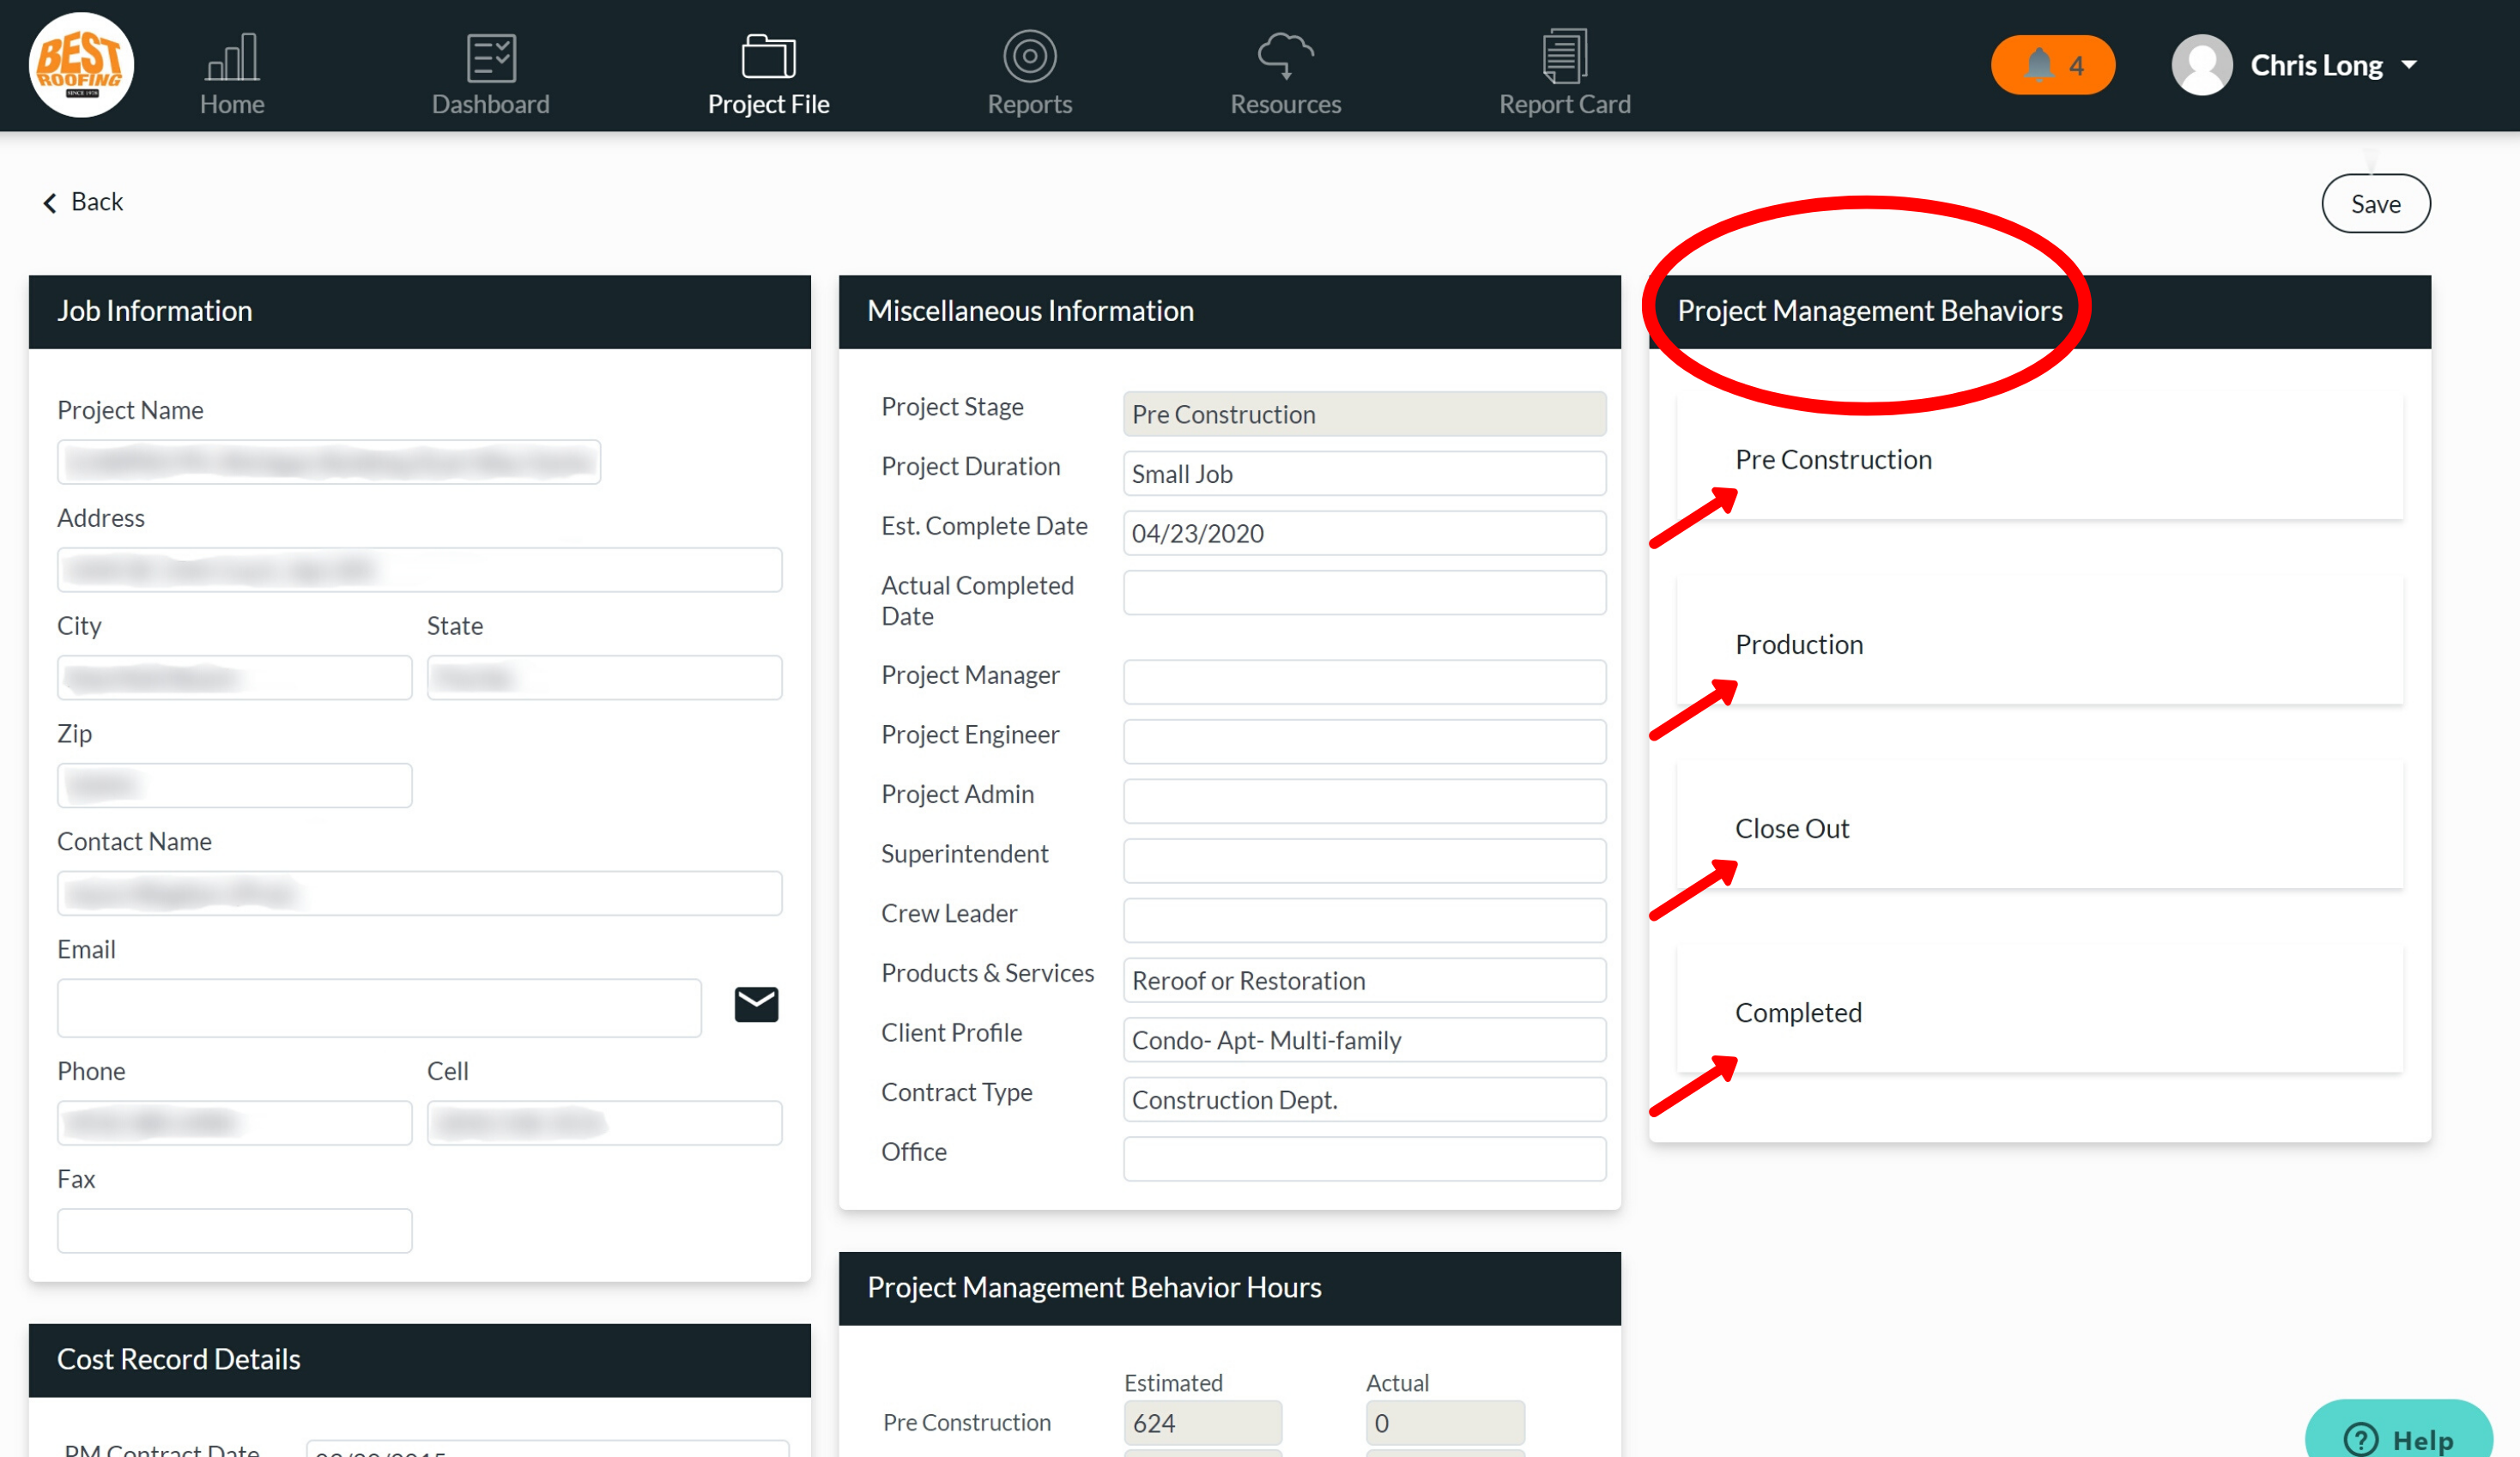
In the project management behaviors section, we break this down into the three phases to completing a project management job: pre-construction, production, and close-out. This tool is meant to track the status of activities that have been completed and those that still need to be completed. For example, in the pre-construction phase, you’re putting your permits in, ordering the materials, emailing operations, allocating budgets, and all those additional administrative tasks you need to prep for the job.
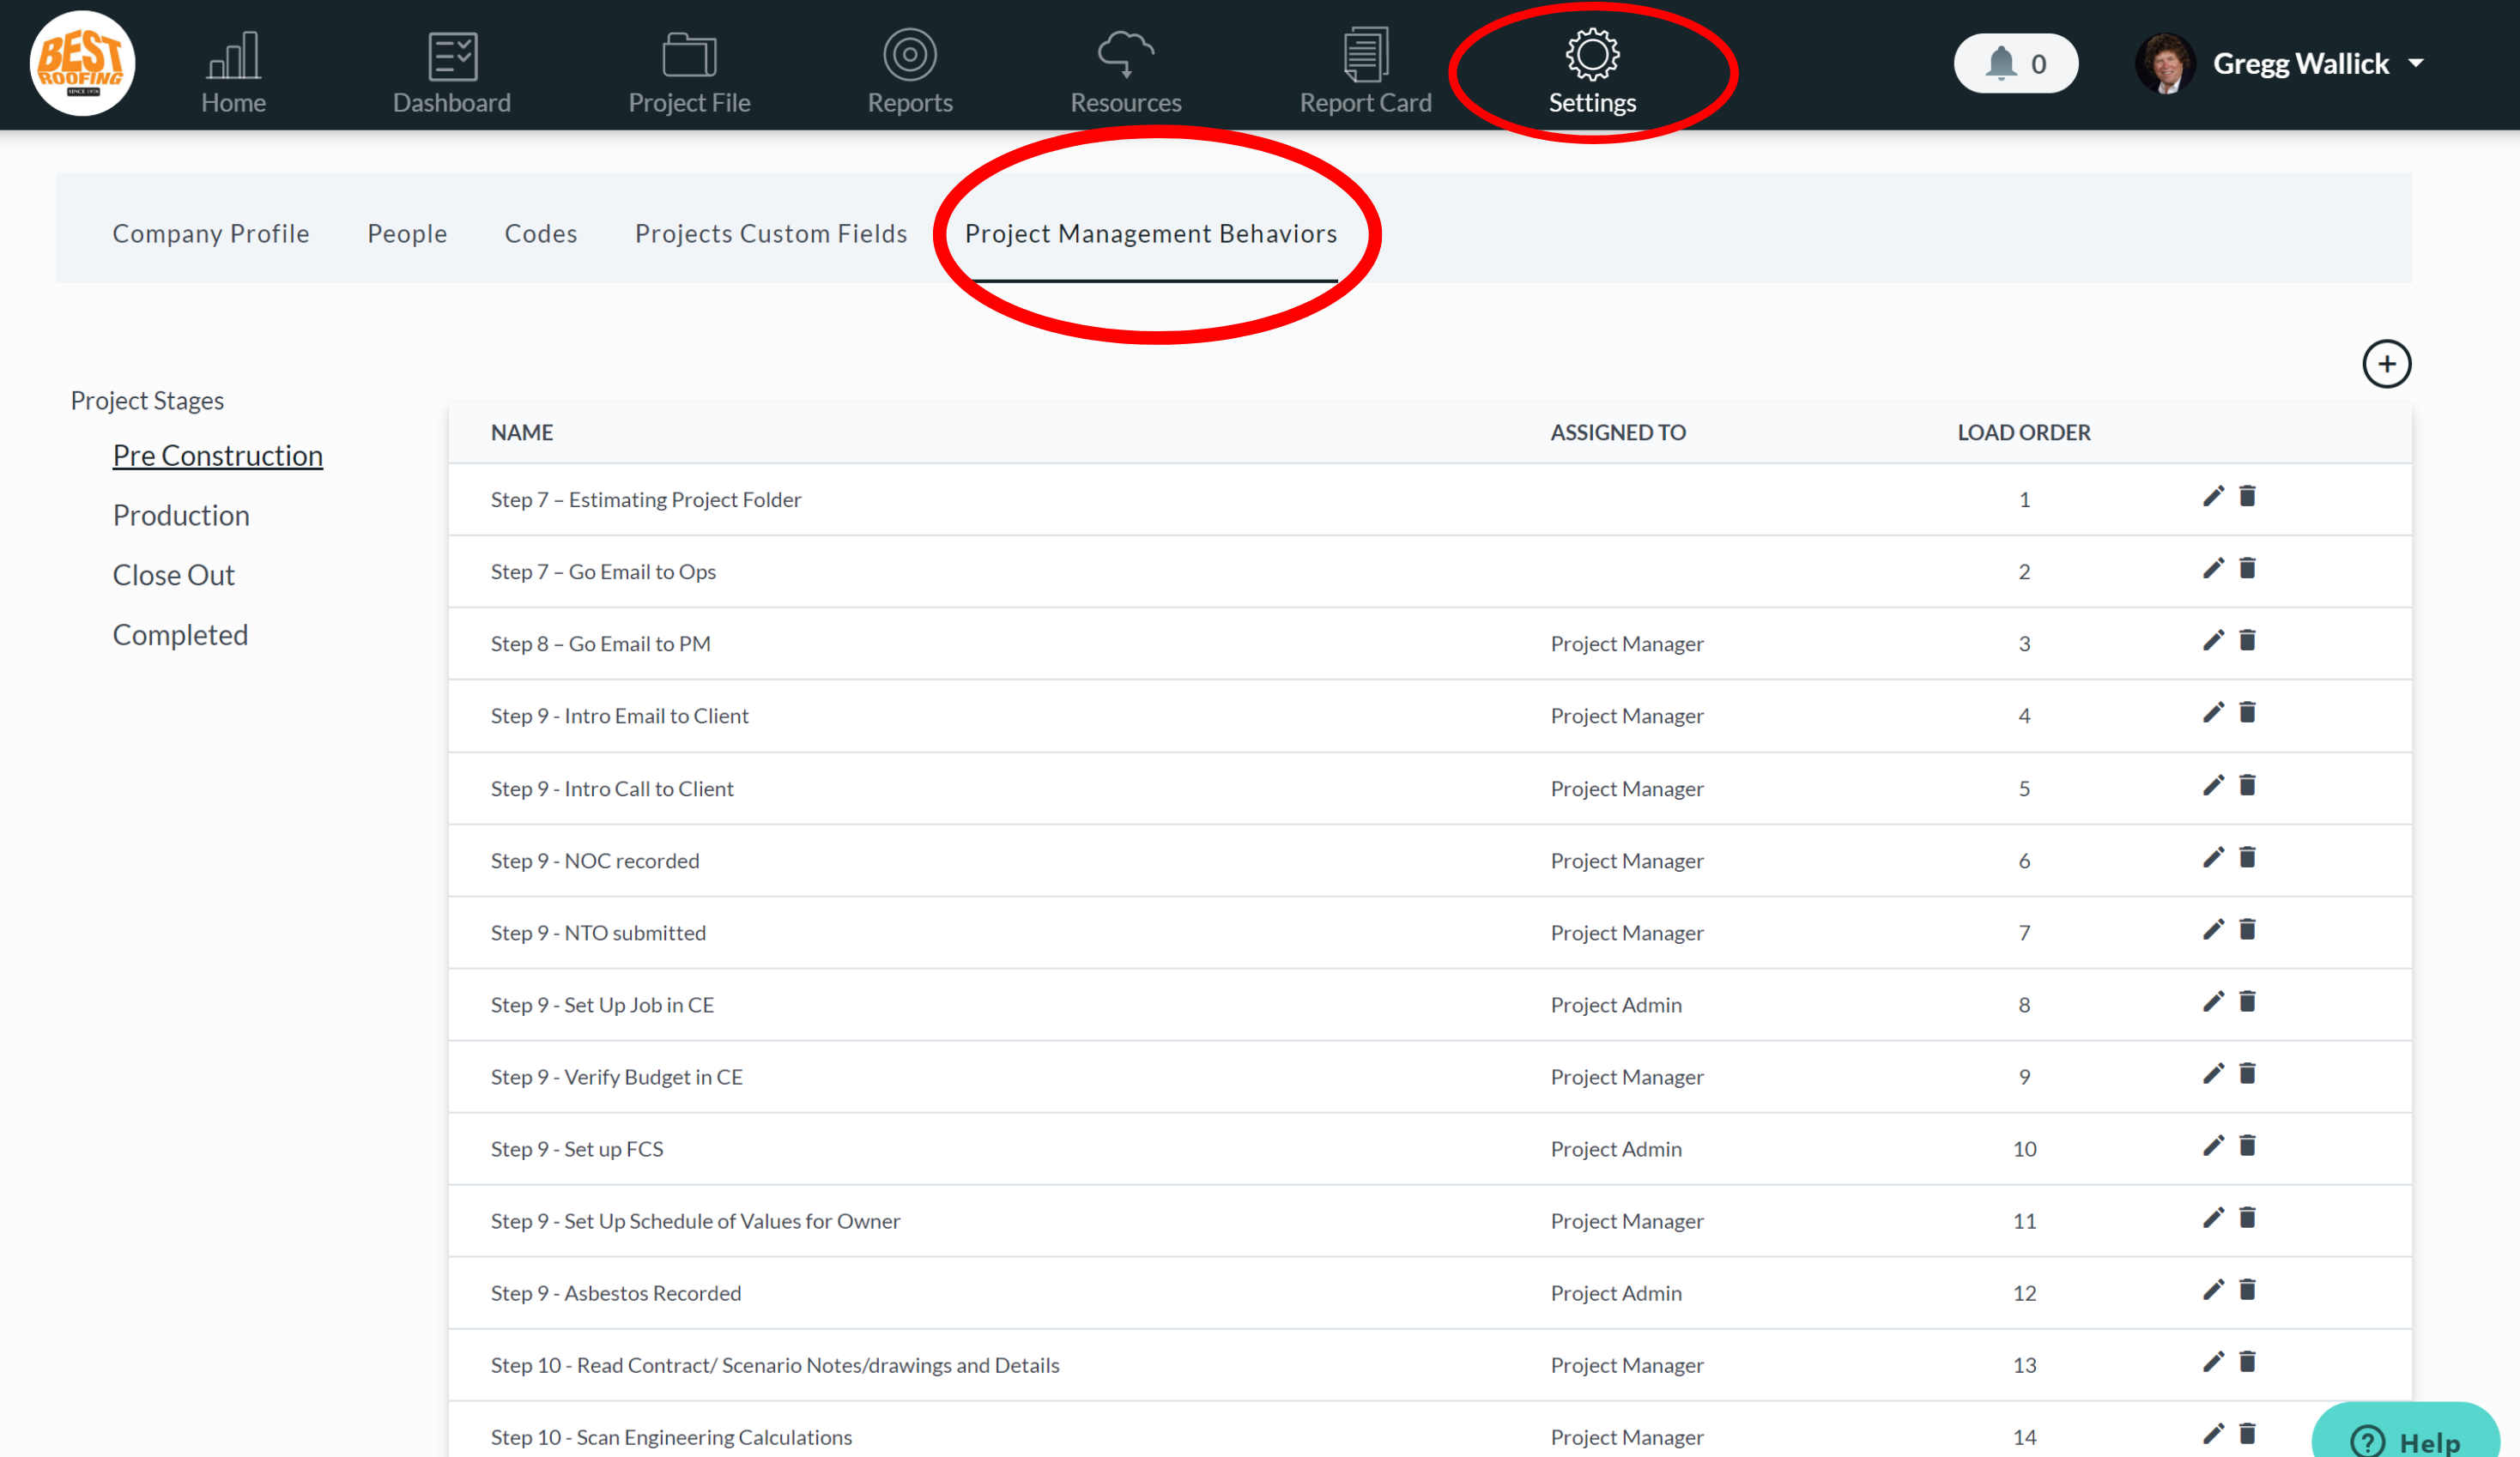
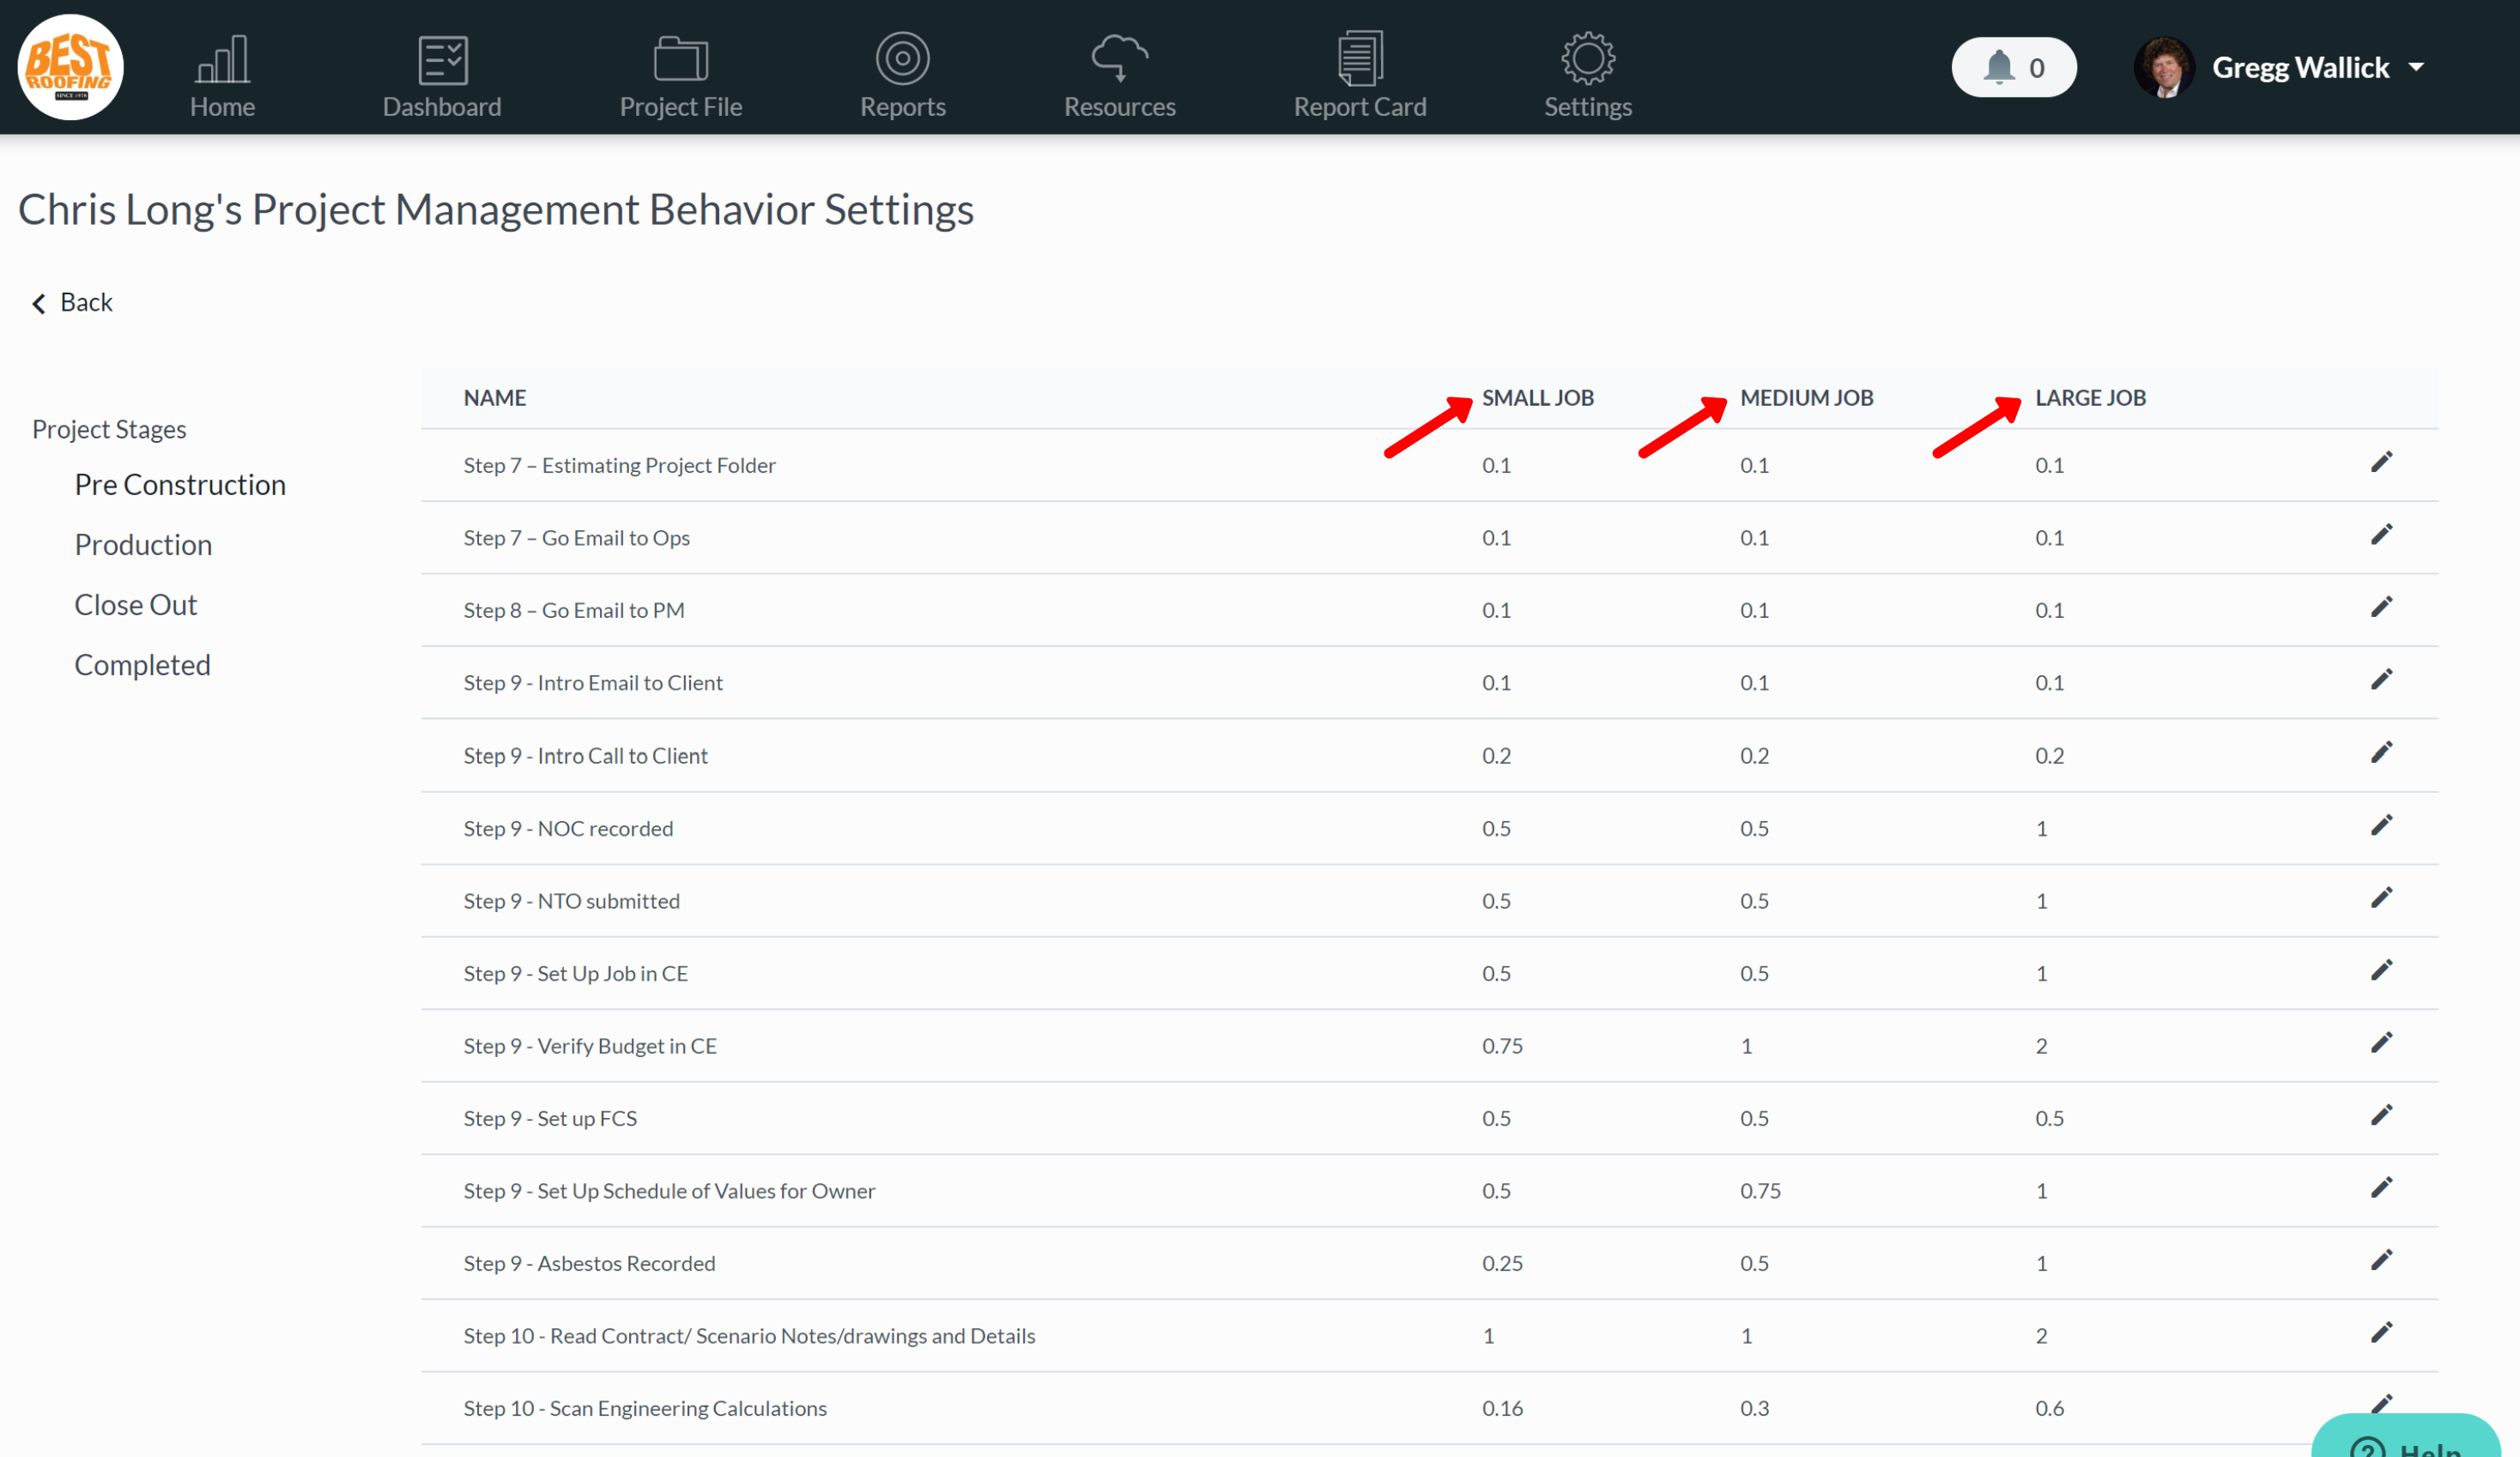
Each of these tasks are 100% customizable and you can create as many or as little tasks as you’d like based on your process. You can create tasks and assign them to job titles by going to the settings and the project management behaviors tab. You can add these tasks by clicking the plus button in the top right corner for each project stage. You can also edit tasks by clicking on the pencil icon and delete existing tasks by clicking on the trash can icon.
Next, we have the project management behavior hours section, found below the miscellaneous information section. Much like the sales behavior section of a sales file, the tasks in the project management behaviors section have a time credit assigned to them. The estimated column includes the total number of credited hours for every task in each phase of the job process. The actual column includes how many hours you’ve completed in each phase. Last, you’ll see the total hours remaining, showing you how much total time is left before completing the entire project.

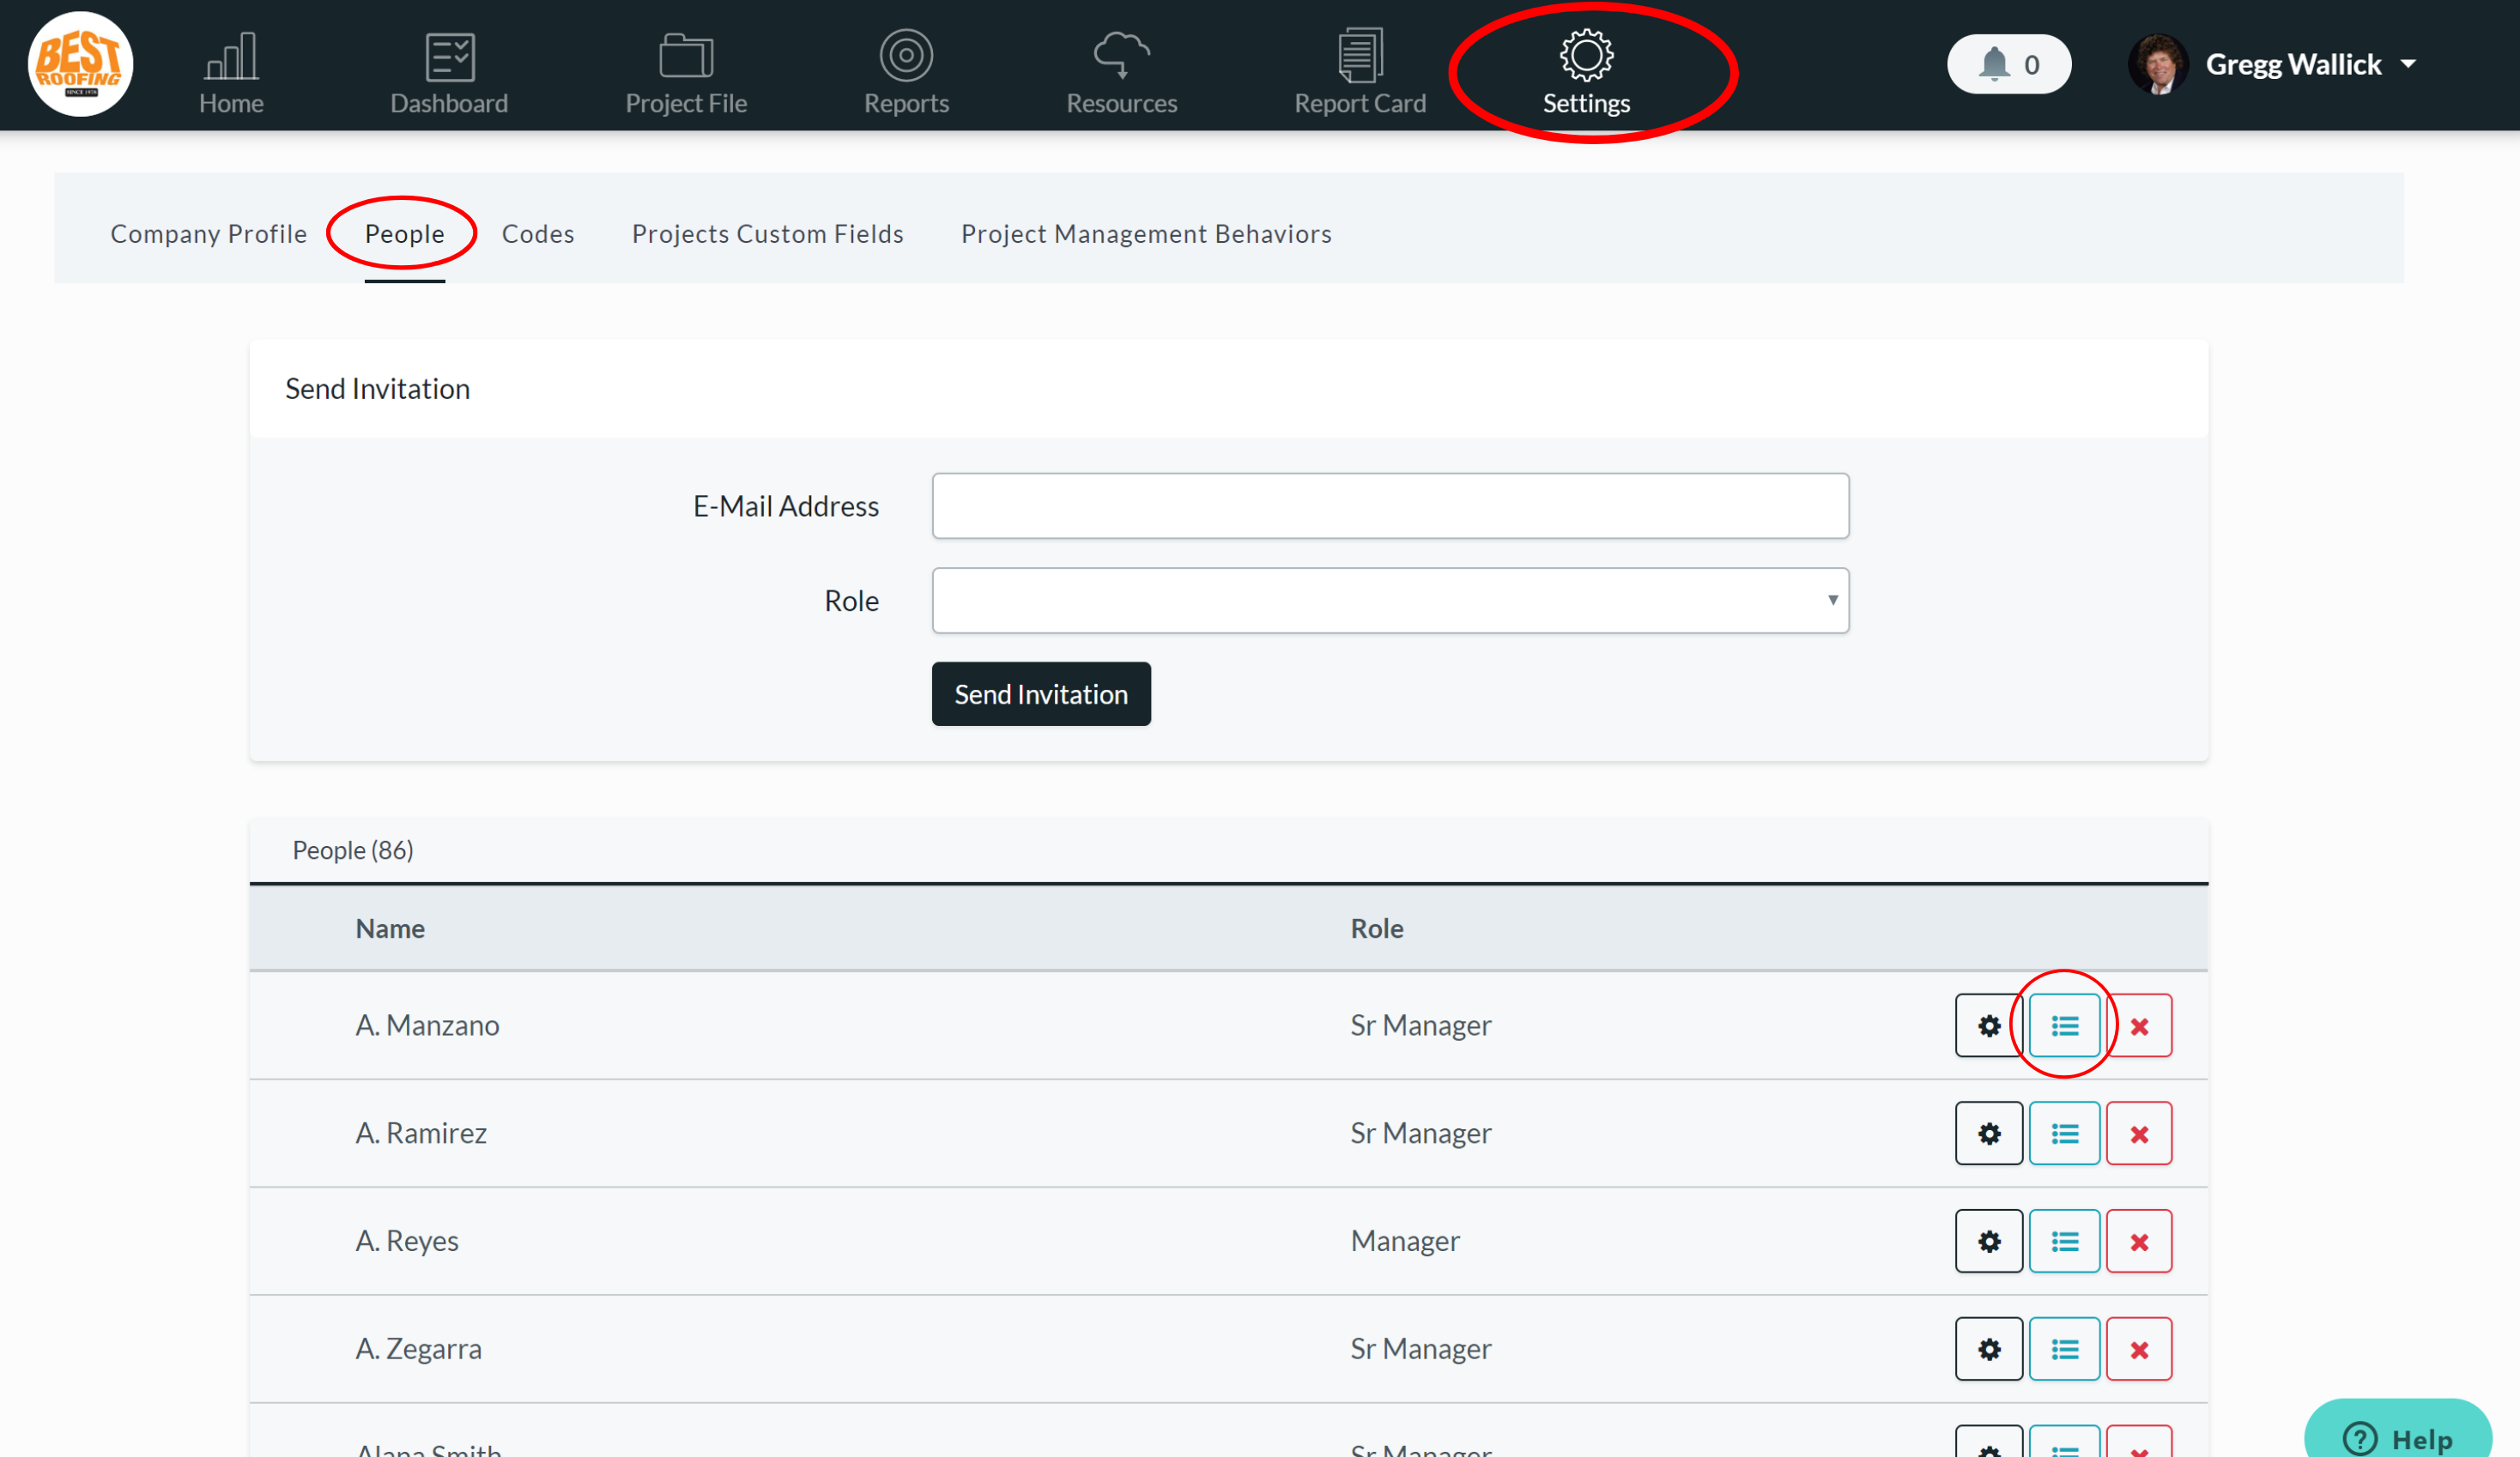
To assign a time credit to a task, go to the settings and the people tab. Click on the middle icon with the three horizontal lines next to the user you want to assign time credits to. After clicking on that, you can add a time credit for a small job, medium job, and large job by each task that user is responsible for.
One last thing that’s important to note is that if you decide to add an additional step to your project management behaviors, that new behavior will be added to every project that has not yet been completed.
Did this answer your question?